Quick answer: To achieve a bubble-free car wrap, hold your felt-buffered squeegee at a consistent 30 to 45-degree angle, apply medium firm pressure, and overlap every single stroke by 50% using a center-out working motion. Never force trapped air down flat; always push it toward an open, unattached edge while maintaining clean, grit-free buffer strips.
The Anatomy of Squeegees, Hardness Levels, and Buffers
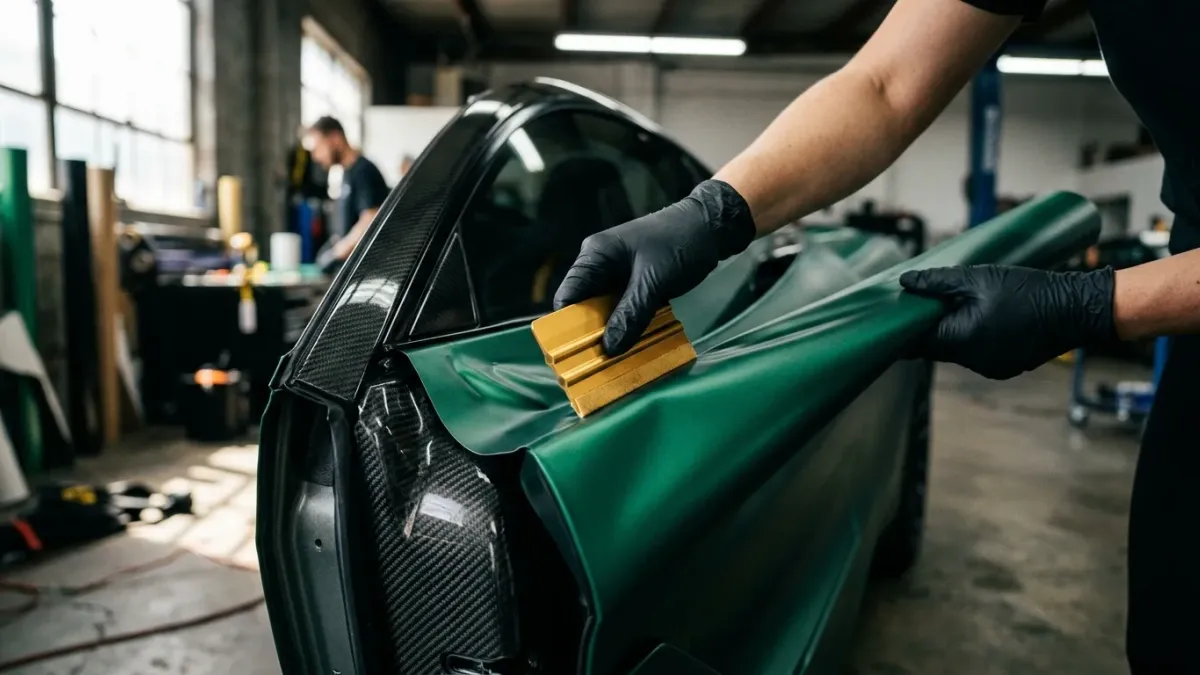
Not all squeegees are built the same, and picking up the wrong density for a specific stage of installation guarantees frustration. Squeegee durometer (hardness) dictates how much flex the tool offers when conforming to curved body panels. Standard 4-inch squeegees generally fall into three hardness tiers: soft (highly flexible, often blue or green), medium (balanced flex, such as the industry-standard 3M PA-1 Gold or Avery Pro Squeegee), and hard (rigid, usually white, orange, or Teflon-infused). Softer squeegees conform beautifully to rounded contours like bumper corners, while hard squeegees give you the leverage needed to tuck film into tight weather-stripping gaps and window trim lines.
Using a bare plastic blade directly on graphic film or color-change vinyl is a recipe for instant surface damage. Premium cast films—like 3.5 mil 3M 2080 Gloss series or 3.2 mil Avery Supreme Wrapping Film (SW900)—require a fresh buffer to prevent micro-marring and surface scratches. Wrap installers choose between dry felt strips, wet suede buffers, and lubricated wing buffers (such as Monkey Strips). Microfiber and suede buffers held wet with a quick-detailer spray glide across delicate gloss or satin finishes without friction, whereas felt buffers excel on dry applications and matte textures where moisture might interfere with edge tack.
When dealing with thicker material like 8 mil paint protection film (PPF) or 4.5 mil calendered vinyl (suited primarily for short-term flat sign graphics), squeegee choice shifts dramatically. PPF requires flexible TPU/rubber squeegees to evacuate liquid slip-solution from beneath the film without gouging the topcoat. For dry vinyl wrap applications, maintaining a fresh buffer strip is non-negotiable; replace your squeegee buffer as soon as it picks up grit or begins to fray at the edge.
| Squeegee Type | Durometer / Flex | Recommended Buffer | Best Application Use Case |
|---|---|---|---|
| Soft (Blue / Rubber) | High Flex | Wet Suede / Wet Felt | PPF fluid evacuation, deep concave curves, headlight film |
| Medium (3M Gold / Avery Pro) | Balanced / Firm Flex | Monkey Strip / Felt Wing | General color-change wraps, hoods, doors, side panels |
| Hard (Teflon / Hard Orange) | Rigid / Zero Flex | Bare Edge or Thin Teflon Tape | Tucking edges into body gaps, window trim, Knifeless tape runs |
Fundamental Stroke Mechanics: Angle, Pressure, and Overlap
Mastering squeegee mechanics requires developing muscle memory around three core variables: stroke angle, hand pressure, and stroke overlap. The gold standard for squeegee orientation is a 30 to 45-degree tilt relative to the panel surface, always angled in the direction of your movement. Holding the squeegee too flat (under 20 degrees) creates a wide contact patch that traps air beneath the adhesive layer. Conversely, holding the squeegee too steep (above 60 degrees) concentrates all your pushing force onto a tiny edge, which can cause the buffer to slice through soft vinyl or create visible pressure lines in the adhesive bed.
Pressure must be deliberate, consistent, and adapted to the stage of application. When initially glassing out a panel—laying a 60-inch wide section across a door or fender—use light flick strokes to set your anchor points without locking down air. Once the vinyl is suspended cleanly over the panel without tension wrinkles, transition to firm, continuous pressure. Your goal is to collapse the air-release channels built into modern cast films (such as 3M Comply or Avery RS technology). These micro-channels allow trapped air to escape laterally, but only when met with firm, flat squeegee passes.
Overlapping your strokes by roughly 50% is the golden rule that separates amateur installations from long-lasting shop builds. If your squeegee blade is 4 inches wide, every new stroke should cover 2 inches of the previously laid vinyl while advancing 2 inches into unattached film. Moving in straight, continuous columns from the center of the panel outward ensures air is constantly driven toward open edges. Never squeegee in random circular patterns or skip across areas, as closing off an escape perimeter creates sealed pockets that require popping with a fine needle point.
Installer tip: If you are working on a large flat panel like a truck hood or roof, divide your working area visually into quadrants. Start from the center line and sweep outward to the left, then from the center line to the right. If you ever hit a small air bubble while wrapping with air-release cast film, do not pierce it right away; instead, place your thumb firmly over the bubble and apply direct, static pressure. The heat and pressure from your thumb force the trapped air horizontally through the film’s microscopic grid channels without damaging the topcoat.
Navigating Curves, Recesses, and Channel Glassing
Applying vinyl to flat door panels is straightforward, but maintaining clean squeegee strokes on complex curves, body lines, and deep recesses demands advanced technique. Before your squeegee ever touches a contoured area—such as the front fascia of a Ford F-150 or the aggressive side scoops of a sports car—you must proper execute surface preparation procedures and "glass out" the panel. Glassing means floating the vinyl over the high points under light, even tension until the material appears completely smooth and wrinkle-free like a sheet of glass, suspended over the recess.
When feeding vinyl down into concave channels, never try to bridge the gap and force the film deep into the valley with a hard squeegee push. Forcing stretched vinyl into a recess with squeegee pressure creates high internal memory stress, causing the wrap to lift or bubble weeks later when exposed to hot summer sun. Instead, work your squeegee along the high flat ridge, then use your buffered tool or a soft wrap glove to feed the film down into the deepest part of the channel first before tacking down the surrounding flat areas.
Heat management plays a central role during squeegee application on curved panels. Use a heat gun set between 100°F and 130°F (38°C to 55°C) to soften cast film slightly when working around compound curves, making it pliable enough for the squeegee to lay down smoothly without forming hard fingers (vertical tension wrinkles). After the vinyl is completely seated into deep recesses, perform mandatory post-heating techniques using an infrared thermometer, heating the recessed film to 195°F–215°F (90°C–102°C) to destroy the memory of the PVC material and set the adhesive permanently.
- Center-Out Pattern: Sweep air toward the nearest open border, keeping escape routes unblocked.
- 50% Overlap Rule: Never advance more than half the width of your squeegee blade per stroke.
- Feed into Recesses: Squeegee the deepest part of a channel first to avoid stretch-induced lifting.
- Controlled Temp Glassing: Warm the film moderately before stroke application on tight contours.
Squeegee Maintenance, Material Costs, and DIY Realities
A damaged or contaminated squeegee will ruin high-end wrap material instantly. Dust particles, metallic specks from vehicle frame rails, or dried adhesive buildup on your buffer strip act like sandpaper against gloss black or metallic vinyl. Standard practice in professional wrap bays involves inspecting buffer edges before beginning every single vehicle panel. Keep a dedicated roller of masking tape in your tool pouch; rolling the sticky side of masking tape across your felt buffer removes loose lint and fine shop dust before you start stroking sensitive films like KPMF, Hexis, or Oracal 970RA.
For DIYers weighing the decision between tackling a project at home or hiring a professional shop, tool technique heavily impacts total material consumption. Wrapping a mid-sized sedan or small SUV requires approximately 18 to 22 linear meters (approx. 55 to 70 feet) of 60-inch wide film, which equates to roughly $600 to $1,100 in high-grade cast material alone. A beginner who struggles with squeegee angle and locks down large air pockets or stretches film improperly may waste multiple panel lengths. In contrast, professional full-vehicle wrap installations in 2026 average $3,800 to $5,500 depending on the vehicle geometry, film finish, and door jamb options selected.
- Inspect squeegee edge for nicks or uneven wear on the plastic core.
- Peel and replace worn felt buffers at the first sign of surface fraying or adhesive bleed.
- Clean buffing strips with isopropyl alcohol (IPA) or lint rollers between panel installs.
- Store squeegees flat in a dedicated tool belt to prevent blade warping.
To guarantee long-term wrap success, invest in high-quality cast vinyl (such as 3M 2080 or Avery SW900) paired with a medium-durometer squeegee fitted with fresh micro-suede buffers. Start your journey on smaller, flat panels like fuel doors, rear decklids, or roof wraps before attempting complex, highly-contoured front bumpers. Always prioritize slow, continuous 50%-overlapping strokes held at a stable 45-degree angle to let the air-release channels do their job effectively.
Frequently Asked Questions
Why does my squeegee keep leaving scratch lines on gloss wrap?
Scratch lines occur when using a worn, dirty, or unbuffered squeegee. Plastic edges pick up microscopic grit from the floor or panel edges, which grinds into the clear coat layer of gloss vinyl. Always use clean micro-suede or wet felt buffers on gloss films, and keep a detail spray handy to lubricate the top surface while squeegeeing.
Can I use a regular plastic squeegee from a hardware store?
Standard hard plastic hardware squeegees lack the proper edge beveling, flexibility, and buffer compatibility needed for vehicle wraps. They easily cut through thin 2.5–3.5 mil cast film and trap air pockets due to uneven pressure distribution. Stick to specialized automotive vinyl squeegees like the 3M PA-1 Gold or Avery Pro Squee