Working with premium wrapping films requires an intimate understanding of thermal dynamics. Over my 15 years in the automotive customization industry, wrapping everything from daily drivers to track-ready supercars, I have found that improper heat management accounts for roughly 80% of all vinyl installation failures. Whether you are dealing with premature lifting in deep bumper recesses or ugly discoloration on compound curves, mastering your heat source is the ultimate dividing line between an amateur attempt and a flawless factory-like finish.
Quick answer: The optimal heat gun temperature for vinyl wrap manipulation is between 120°F and 160°F (49°C to 71°C) to make the film pliable for stretching. For final post-heating to kill the film's memory, you must elevate the surface temperature to 195°F–215°F (90°C–102°C) for cast films like 3M 2080 or Avery SW900, while heavier calendered materials require 215°F–230°F (102°C–110°C).
Heat Gun Temperature for Vinyl Wrap: The Essential Temperature Guide
To consistently hit your target heat without scorching expensive material, you must differentiate between air temperature coming out of your nozzle and the actual surface temperature of the film. Dialing in your heat gun temperature for vinyl wrap projects depends heavily on the specific stage of application and the material architecture. Premium dual-layer cast vinyls, such as cast vinyl films like 3M 2080 (3.5 mil) or Avery Supreme Wrapping Film (3.2 mil), respond best to gentle, sweeping heat during the initial laying phase, whereas thicker structural films demand a higher thermal threshold.
When applying vinyl to complex body panels, working in distinct thermal zones keeps the adhesive stable while allowing maximum conformability. Below 100°F, vinyl remains rigid, risking tear lines or aggressive adhesive transfer if forced into channels. Above 180°F during stretching, the PVC face film loses structural integrity, leading to severe thinning, loss of gloss, or overstretching that shows up as white discoloration ("ghosting") on dark metallic wraps.
| Vinyl Stage / Material Type | Optimal Surface Temp Range | Heat Gun Setting (Nozzle Temp) | Primary Objective |
|---|---|---|---|
| Relaxing & Warming (Cast) | 120°F – 140°F (49°C – 60°C) | 350°F – 450°F | Relieve glass tension and soften adhesive for initial tack. |
| Stretching & Conforming (Cast) | 140°F – 160°F (60°C – 71°C) | 450°F – 600°F | Maximize elongation without distorting print or finish. |
| post-heating (Cast Vinyl) | 195°F – 215°F (90°C – 102°C) | 750°F – 900°F | Break internal memory limit; melt initial adhesive cross-links. |
| post-heating (Calendered) | 215°F – 230°F (102°C – 110°C) | 800°F – 950°F | Force rigid PVC memory relaxation on flat-to-mild curves. |
| Paint Protection Film (PPF) | 120°F – 130°F (49°C – 54°C) | Warm Water / Light Heat | Softens 6-8 mil urethane matrix without yellowing topcoat. |
Understanding Vinyl Memory and Thermal Dynamics
Every roll of film leaves the manufacturing plant with a molecular memory set to flat. Modern premium cast films are manufactured by pouring liquid synthetic resin onto a casting sheet, resulting in a relaxed, low-stress state with minimal inherent memory. Conversely, calendered films are rolled out like dough, leaving residual internal stress that constantly pulls back toward a flat shape. Understanding this distinction is vital when preparing to wrap high-stress zones like door handles, wide body quarter panels, or aggressive front diffusers.
When you stretch cold vinyl over a severe curve, you introduce immense kinetic tension into the face film. Without appropriate thermal energy applied during installation, the adhesive underlayer—no matter how advanced its pressure-activated air-release channels are—will slowly lose the battle against the film’s elastic pull. Over a period of weeks, thermal cycling from natural sun exposure triggers the vinyl to pop out of deep pockets or shrink back from trimmed edges, leading to costly re-wraps.
Installer tip: Always carry a digital infrared thermometer (laser pyrometer) on your tool belt during installation. Relying on hand proximity or "eyeballing" heat is the single quickest way to burn through a $60-per-meter roll of specialty satin film. When post-heating bumper corners, hold the heat gun 8 to 12 inches away, continuously moving the nozzle in sweeping motions, and verify surface temperature every 3 seconds until you hit a steady 200°F across the entire stress line.
Advanced Heat Gun Techniques for Compound Curves and Channels
Mastering difficult curves requires techniques beyond simply pointing the nozzle at the car. Success comes down to cold-pre-stretching, bridging, and using controlled shrinking rather than shoving hot film directly into depressions. Applying heat to vinyl while it is pushed under pressure into a recess creates localized thinning that leads directly to failure.
The "Bridge and Feed" Method for Deep Recesses
Instead of stretching film down into a channel (like the deep fog light pockets on a modern Ford F-150 or Tesla Model Y), you must "feed" relaxed film into the void. Lay the vinyl flat across the opening, creating a loose bridge over the entire pocket. Warm the bridged area evenly to roughly 130°F until the film loses all tension and begins to sag slightly under its own weight.
Once the vinyl reaches this pliable state, remove your heat source immediately. Wearing a clean, low-friction micro-fiber wrapping glove, gently massage the warm, relaxed vinyl down into the lowest point of the recess using small circular motions. Because you warmed the entire bridge rather than heating localized spots as you went, the tension is distributed evenly across the surface rather than concentrated on the deepest lip.
Pre-stretching and Controlled Thermal Shrinkage
For sharp outward curves, like side mirror caps or sharp bumper corners, direct stretching over the tip causes thin edges that peel up later. Professional installers rely on pre-stretching (also known as cold-stretching) to solve this problem. Take your panel section, apply medium heat to the central field, and stretch the film 10-15% past the boundaries of the convex object before laying it on the apex.
Once anchored to the highest point, apply targeted heat to the unanchored outer edges. Due to the thermoplastic memory properties of cast films like Avery SW900 or Oracal 970RA, the heated outer vinyl will shrink rapidly around the contour, wrapping itself tightly around the back edge with zero tension on the critical outer radius. Proper execution of this method allows a full wrap on a full-size SUV using roughly 22 to 25 linear meters of 60-inch film without high-risk stress points.
Post-Heating: Eliminating Film Memory for Long-Term Durability
Post-heating is an absolute requirement that separates amateur projects from durable installations guaranteed to last 5 to 7 years. Once your installation is complete, all squeegee lines smoothed out, and all edges tucked cleanly behind panel gaps, you must systematically raise the surface temperature of every manipulated section to its permanent reset threshold.
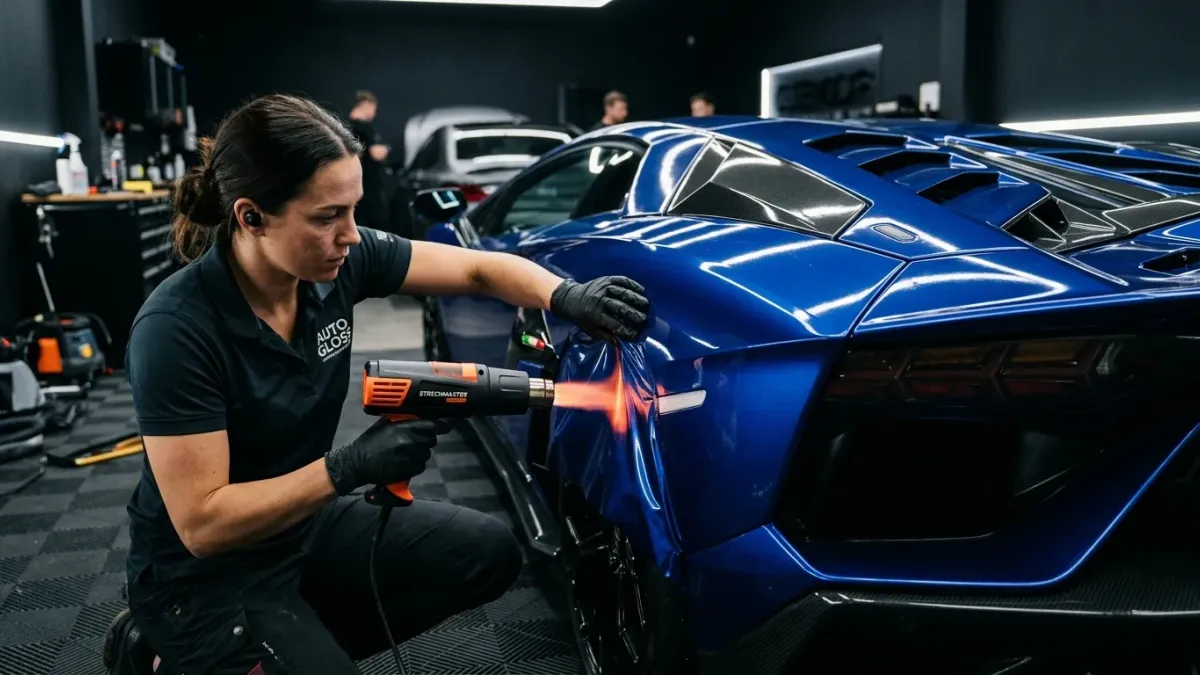
Post-heating requires systematically scanning every stretched area with your heat gun set to high airflow. Bring the film surface to 195°F–215°F (90°C–102°C) for cast materials, maintaining that temperature for at least 3 to 5 seconds per square inch. This process re-organizes the molecular structure of the PVC layer, permanently locking in the new shape and ensuring that even continuous summer heat reaching 140°F on dark body panels won't trigger edge lifting or bubble formation.
Do not skip checking your work with your thermal sensor. Under-heating a deep recess to only 170°F leaves the memory intact, making failure almost guaranteed within three months. Conversely, exceeding 240°F risks blistering the clear coat finish, scorching the vinyl's protective top layer, or permanently burning the pressure-sensitive adhesive underneath.
Essential Heat Application Tools for Professional Results
Achieving clean results demands professional wrap tools capable of exact thermal control and consistent safety profile during long installation sessions.
- Digital Variable Temperature Heat Gun: Standard hardware store paint-strippers lack precise control. Choose a professional unit like the Steinel HG 2320 E or a cordless Milwaukee M18 FUEL heat gun, which offer precise digital display settings from 120°F to 1200°F.
- Infrared Thermometer / Thermal Imager: Non-contact point pyrometers are essential for real-time post-heat monitoring across recess edges and tucked perimeter lips.
- Professional Application Gloves: Lint-free, high-density cotton/synthetic blend gloves allow installers to touch and smooth 150°F vinyl directly without transferring fingerprints or skin oils to the adhesive matrix.
- Knifeless Finish Line Tape: Crucial for cutting wrapped recessed lines safely without risking vehicle clear coat cuts, especially when trimming around wrapped bumper inserts.
Frequently Asked Questions
What happens if I over-heat vinyl wrap with a heat gun?
Overheating causes the PVC film to melt, burn, or thin out excessively, destroying the texture on satin/matte finishes or leaving glossy films cloudy. It also damages the pressure-sensitive adhesive beneath, leading to premature adhesion failure, discoloration, and difficult clean-up during future removal.
Can I use a hair dryer instead of a professional heat gun?
A standard hair dryer does not generate sufficient BTU output or localized air velocity to reach the required post-heating temperatures of 195°F to 215°F. Hair dryers may work for minor flat surface fixes, but they are insufficient for stretching around complex curves or resetting film memory in deep recesses.
How long should I apply heat to a vinyl section during post-heating?
Keep your heat gun in continuous motion, holding the stream on a specific localized zone just long enough to bring the surface temperature to 195°F–215°F for 3 to 5 seconds. Never hold the gun motionless in one spot, as concentrated heat will burn through the material in seconds.
Why does my vinyl wrap keep popping out of deep recesses after heating?
Popping out happens when the vinyl was stretched directly into the recess under high tension rather than fed in relaxed, or because the area was not properly post-heated past 195°F to kill its shape memory. Surface contamination or moisture left deep in panel channels prior to installation can also prevent the adhesive from bonding fully.
For best results on your next project, invest in a reliable variable-temperature heat gun and an infrared thermometer before touching high-stress panels. If you are working on complex modern front bumpers or deeply recessed doors, select a premium 3-mil cast vinyl like 3M 2080 or Avery SW900, plan your relaxation bridges carefully, and always post-heat stretched edges to a verified 200°F to guarantee years of reliable durability.