Disclosure: As an Amazon Associate, we earn from qualifying purchases.
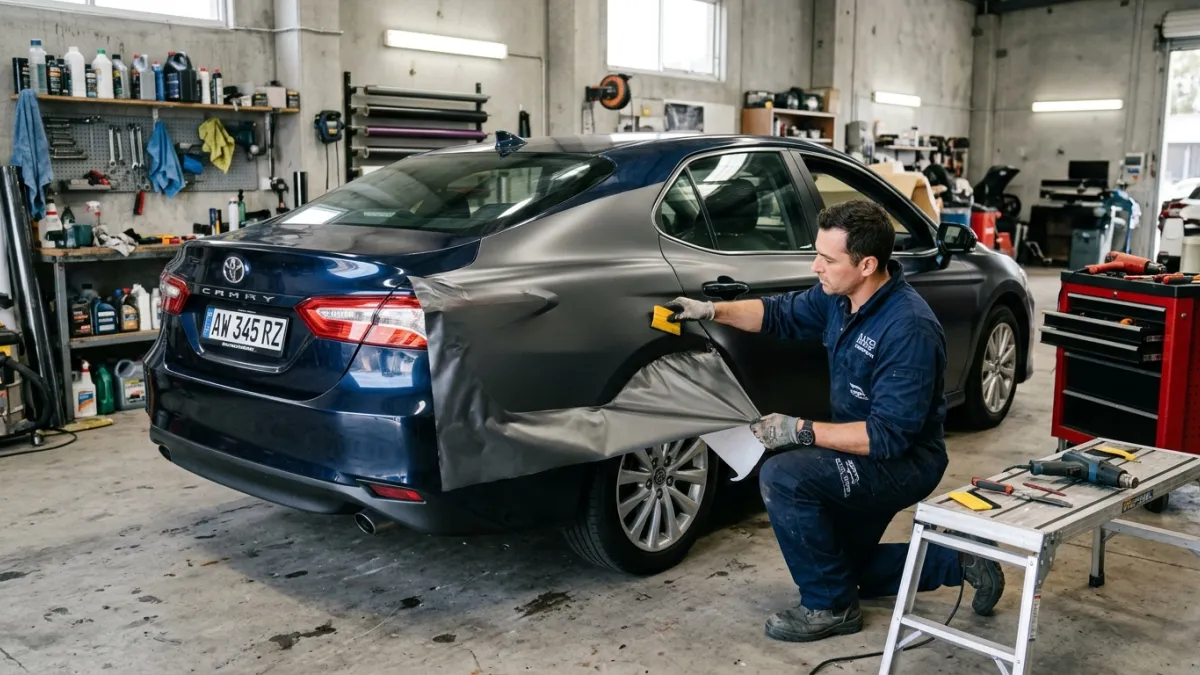
Car vinyl wrapping involves applying a specialized, pressure-sensitive, heat-activated film—typically 2.5 to 3.5 mil thick cast vinyl—directly over factory paint to transform a vehicle's appearance, alter its finish, or add custom graphics. Professional full-vehicle installation costs range between $2,000 and $6,000+ depending on body size, panel complexity, and material type, whereas a self-installed DIY project generally ranges from $600 to $1,200 for film and specialized tools. High-quality cast films from industry-leading manufacturers, such as 3M, Avery Dennison, and ORAFOL, deliver a durable, weather-resistant service life of 5 to 7 years when properly applied, post-heated, and maintained with correct washing routines.
Cast Vinyl vs. Calendered Vinyl vs. PPF
Selecting the correct film substrate is crucial before beginning any wrapping project. Wrapping films fall into three primary categories based on manufacturing processes and material composition:
- Cast Vinyl (2.5–3.5 mil thick): Manufactured by pouring liquid PVC onto a casting sheet, resulting in a thin, dimensionally stable film with zero physical memory. It stretches effortlessly across deep bumper recesses, body lines, and compound curves without shrinking back or lifting over time. Most premium wrapping films feature micro air-release channels within the adhesive layer to prevent bubble entrapment.
- Calendered Vinyl (3.5–6.0 mil thick): Formed by extruding molten PVC through heavy steel rollers. Calendered film is thicker, stiffer, and retains memory of its flat sheet state. Heat causes calendered vinyl to stretch, but UV exposure causes it to shrink back toward its original dimensions, making it suitable only for flat surfaces, commercial box trucks, or short-term flat graphics.
- Paint Protection Film / PPF (8.0 mil thick): Built from clear or tinted thermoplastic polyurethane (TPU) rather than vinyl. Designed specifically for high-impact impact absorption (rock chips, road debris, gravel) rather than pure cosmetic color changes. PPF features a self-healing topcoat that eliminates light swirl marks under heat exposure.
| Film Type | Thickness | Primary Application | Expected Lifespan |
|---|---|---|---|
| Cast Vinyl Film | 2.5 – 3.5 mil | Full vehicle color changes, deep curves, custom graphics | 5 – 7 years |
| Calendered Vinyl Film | 3.5 – 6.0 mil | Flat panels, short-term signage, partial graphics | 2 – 3 years |
| Paint Protection Film (PPF) | 8.0 mil | Heavy impact protection, rock chip defense | 7 – 10 years |
Vehicle Coverage, Material Quantities, and Costs
Determining the amount of film required depends on vehicle dimensions, body contours, and installer experience. Professional roll stock standard width is 60 inches (5 feet), allowing seamless coverage across hoods, roofs, and side panels.
Material Quantities by Vehicle Type
- Coupes & Compact Sedans (e.g., BMW M3, Subaru BRZ): 50 to 55 linear feet (15 to 17 meters) of 60-inch film.
- Midsize Crossovers & SUVs (e.g., 2024 Tesla Model Y): 55 to 65 linear feet (17 to 20 meters) of 60-inch film. Professional wrap installation on a Model Y ranges from $4,200 to $5,800 depending on finish choice.
- Full-Size Trucks (e.g., Ford F-150 Crew Cab): 60 to 75 linear feet (18 to 22 linear meters) of 60-inch film due to elevated roof height and wide bed sides.
2025–2026 Cost Comparison
Professional labor costs account for roughly 60% to 70% of total invoice pricing due to extensive disassembly (door handles, mirrors, headlights, tail lights), chemical cleaning, edge wrapping, and post-heating steps. Standard gloss, matte, and satin color changes sit at baseline pricing, while specialty textures, satin metallic shades, flip-colors, and real chrome films carry higher raw material costs and longer installation times.
Popular Vinyl Wrap Brands Compared
Master Thermal Stretching: Wagner HT1000 Variable Temp Heat Gun

Leading vinyl manufacturers engineer specific adhesive formulations and face films to balance installer usability with outdoor durability.
3M 2080 / 1080 Series
3M 2080 features a dual-cast construction designed for high dimensional stability. Gloss colors come equipped with a clear Protective Cap Layer that remains on the film during application to prevent squeegee scratches, which is peeled off prior to post-heating. 3M's Comply adhesive technology utilizes micro-replicated channels for air release, combined with Controltac pressure-activated sliding properties.
Avery Dennison Supreme Wrapping Film (SW900)
Widely recognized as the most user-friendly film for both beginner DIYers and high-volume commercial shops. Avery's Easy Apply RS technology features extremely low initial tack, allowing installers to slide and reposition panels effortlessly before applying firm pressure with a squeegee. It stretches exceptionally well around tight bumpers without requiring excessive heat.
Oracal 970RA Premium Wrapping Cast
Manufactured by ORAFOL, Oracal 970RA utilizes RapidAir release technology. The film is slightly firmer than Avery SW900, offering structural rigidity that makes it resistant to over-stretching on large, flat hood or roof panels. It features outstanding chemical resistance and high gloss depth.
Essential Tool List for DIY and Professional Installers
Achieving clean installation results requires specialized automotive vinyl wrapping tools:
- Heat Gun with Digital Temperature Display: Used for softening film during stretching and reaching exact post-heating thresholds.
- Infrared Non-Contact Thermometer: Essential for verifying surface temperatures during post-heating.
- Squeegees with Replaceable Felt Buffers: Hard squeegees paired with wet or micro-suede felt strips prevent face-film scuffing.
- Knifeless Tape (Design Line / Finish Line): Filament-bearing adhesive tape that cuts vinyl cleanly on paint body panels without razor blade contact.
- 3M Rivet Brush & Heat-Resistant Wrapping Gloves: Microfiber gloves allow installers to press vinyl into channels using fingertips without transferring skin oils.
- Prep Solvents: Isopropyl Alcohol (70% IPA to 30% distilled water mixture), wax remover, and dedicated surface prep cleaners.
Step-by-Step Vinyl Installation Technique
1. Decontamination and Surface Preparation
Bubble-Free & Scratch-Free Application: Ehdis Professional Wrap Tool Kit

Deep surface cleaning determines long-term film adhesion. Wash the vehicle thoroughly with a wax-free strip shampoo. Treat body panels with a clay bar to remove embedded industrial fallout, rail dust, and tar spots. Clean all panel edges, rubber weather seals, and door jambs using a 70/30 Isopropyl Alcohol mixture. Allow all trapped moisture beneath moldings to dry completely.
2. Panel Measurement and Film Glassing
Unroll film and cut panels with a 3 to 4-inch excess border on all sides. Tack the film to the panel using low-tack magnets or tape. Remove the backing paper slowly. Anchor the vinyl to the center of the panel and pull even tension outward across the flat surface to establish a wrinkle-free bridge—a process known as "glassing" the film.
3. Squeegee Technique and Air Removal
Hold the felt-edge squeegee at a steady 45-degree angle. Work systematically from the center outward toward the edges using overlapping strokes with moderate downward hand pressure. The air-release grid beneath the film permits trapped air to escape without requiring pinpricks.
4. Controlled Heating and Stretch Thresholds
When conforming vinyl around convex contours or complex bumper intakes, apply gentle heat using a heat gun set between 120°F and 140°F (50°C to 60°C). Soften the vinyl and stretch it evenly across broader surfaces rather than pulling hard on cold film. Limit total stretch to under 15% to 20% to prevent finish distortion or adhesive failure.
5. Trimming with Knifeless Tape and Edge Tucking
Lay Knifeless tape along panel seams prior to laying vinyl. Once the vinyl is squeegeed over the tape line, pull the high-strength filament through the film to produce a razor-sharp cut line with zero paint risk. Wrap remaining vinyl edges 1/8 to 1/4 inch around the inner lip of panel edges for secure coverage.
6. Post-Heating (Critical Final Step)
Vinyl films possess memory of their flat manufacturing state. Once stretched into body lines, recesses, or wrapped edges, the film must be post-heated using a heat gun and monitored with an infrared thermometer to 195°F–212°F (90°C–100°C). Heating to this precise threshold resets the polymer memory, locking the film into its new shape and preventing edge lifting or receding.
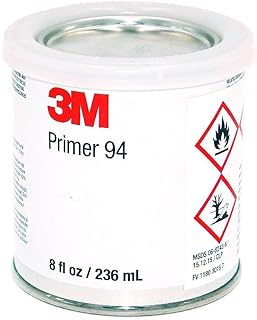
Lock Down High-Tension Edges: 3M Primer 94 Adhesion Promoter
Aftercare Routine for Maximum Longevity
Proper maintenance protects vinyl wrap from UV degradation, environmental contaminants, and edge lifting:
- Hand Washing: Hand wash the vehicle every 1 to 2 weeks using a pH-neutral car wash soap and two-bucket wash method. Avoid automated drive-through car washes with rotating mechanical brushes.
- Pressure Washer Cautions: Keep pressure washer nozzles at least 12 to 18 inches away from panel seams and vinyl edges. Limit water pressure to under 2,000 PSI and water temperature below 140°F (60°C).
- Protection Treatments: Apply a synthetic vinyl sealant or a ceramic coating formulated specifically for matte or gloss vinyl every 6 months to repel oil, dirt, and water spots while adding UV resistance. Avoid traditional petroleum-based car waxes.
Frequently Asked Questions
Does vinyl wrapping damage original factory paint?
High-quality cast vinyl applied to sound OEM factory paint will not cause damage. The film shields factory clear coats from minor UV degradation and light surface abrasion. However, if the vehicle has poor aftermarket repaint work or peeling clear coat, removing the film later may lift loose paint layers.
How long does it take to wrap a full car?
A professional installation team generally takes 3 to 5 business days for a complete vehicle wrap, including disassembly, surface prep, installation, post-heating, reassembly, and curing time. DIY solo installations typically take 20 to 30 labor hours spread across a week.
Can vinyl wraps be ceramic coated?
Yes. Specialized ceramic coatings formulated for flexible vinyl surfaces enhance dirt repellency, hydrophobic properties, and UV resistance without altering the finish (gloss coatings maintain shine, while dedicated matte coatings preserve matte finishes without adding artificial sheen).