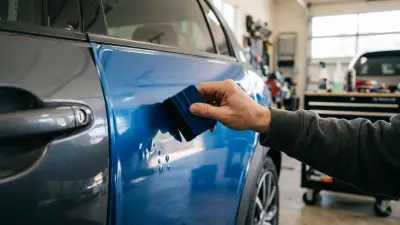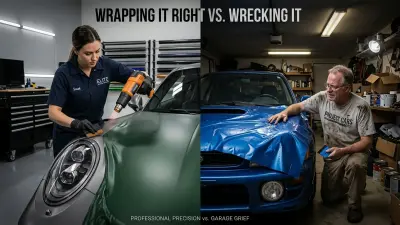
You’ve poured your heart and soul into that vehicle wrap. Hours spent meticulously aligning panels, painstakingly squeegeeing out every air bubble, and carefully trimming every edge. Your ride looks absolutely stunning, transformed with its fresh new color or custom graphics. You’re probably itching to take it for a spin and show it off, right? Hold on a second. Before you slap your final seal of approval on the job, there are two absolutely critical, yet often overlooked, steps that truly separate a good wrap from one that lasts for years: post-heating and edge sealing. Trust me, after wrapping hundreds of vehicles over my 15 years in this business, I’ve seen firsthand how skipping these final touches can lead to premature failure and a whole lot of heartbreak down the road. These aren't just extra steps; they are the bedrock of a long-lasting, durable wrap that resists lifting, peeling, and shrinkage, ensuring your investment looks sharp for its entire lifespan. Let’s dive into why they’re so important and, more importantly, how to do them right.
The Imperative of Post-Heating: Locking in Adhesion and Erasing Memory
Think of post-heating as sending your vinyl wrap to a memory-erasing retreat. When you stretch and apply vinyl, especially around complex curves, recesses, and rivets, the material, despite its flexibility, retains a "memory" of its original flat state. This isn’t a flaw in the film; it's simply the nature of polymers. Without proper post-heating, this inherent memory can cause the wrap to slowly pull back, lift, or shrink over time, especially in high-stress areas where the film was stretched the most. It’s a slow, insidious process that can lead to edge failure or even bubbles reappearing weeks later.
What exactly is post-heating? Simply put, it's the process of reheating the vinyl wrap to a specific, elevated temperature *after* the initial installation is complete. This carefully controlled reheating effectively "resets" the film's memory. It allows the vinyl's adhesive to fully activate and the film to permanently relax into the vehicle's contours without the latent tendency to revert to its original shape. This isn't about applying more initial heat; it's about a secondary heat application that ensures long-term stability.
Why is this so critical for longevity? Firstly, it relieves stress. High-performance cast vinyl films, like 3M 2080, Avery Supreme Wrapping Film, or Oracal 970RA, are premium, heat-activated films designed for complex curves because they have minimal inherent memory and great conformability. However, even these films, typically 2.5-3 mil thick, need post-heating to ensure that once stretched, they stay stretched. Calendered vinyl, on the other hand, is a more affordable, stiffer film (often 3-4 mil) better suited for flat surfaces, and it has an even stronger memory, making post-heating even more vital for any contoured application. Secondly, it ensures permanent adhesion. Post-heating helps the pressure-sensitive adhesive bond fully with the vehicle's paint surface, particularly in deep recesses, intricate curves, and around edges where the adhesive might not have initially formed a complete, permanent bond. This deep activation is essential for the adhesive's long-term performance.
Thirdly, and perhaps most importantly, post-heating prevents lifting and shrinkage. This is the biggest win for any wrap installer, DIY or professional. Proper post-heating drastically reduces the chances of edges lifting or the film shrinking back from cut lines over time, which is a common failure point for inexperienced DIYers. I recall a client who tried to wrap his 2024 Tesla Model Y in a bold satin black himself. He skipped post-heating entirely, and within six months, the film around the door handles and bumper recesses had noticeably pulled back, exposing the original paint. It was a costly lesson, effectively turning a $3,500 DIY attempt into a $5,000 professional re-wrap. Had he invested a little more time in proper post-heating, he would have saved thousands.
Mastering Post-Heating Techniques: Your Step-by-Step Guide
Achieving proper post-heating isn't just about blasting the film with a heat gun. It requires precision, the right tools, and a methodical approach. Cutting corners here is an express ticket to early wrap failure, undermining all the hard work you’ve already put in. This is where you transform your wrap from a temporary aesthetic change into a durable, long-term paint protector and style statement.
Essential Tools for Precision Post-Heating
- Heat Gun: A professional-grade heat gun with accurate temperature control is non-negotiable. Forget the cheap hair dryers or construction-grade blowers. You need a tool like the Steinel HG 2310 LCD, Milwaukee M18 Fuel, or a comparable digital heat gun. These allow you to set and maintain specific temperatures, preventing both underheating and catastrophic overheating.
- Infrared Thermometer: Absolutely critical for accuracy. This isn't optional; it's your temperature guardian angel. Brands like Klein Tools IR5, Fluke, or even a good quality generic laser thermometer are perfect. Guessing temperatures is a recipe for disaster, leading to either insufficient memory release or damaging the vinyl.
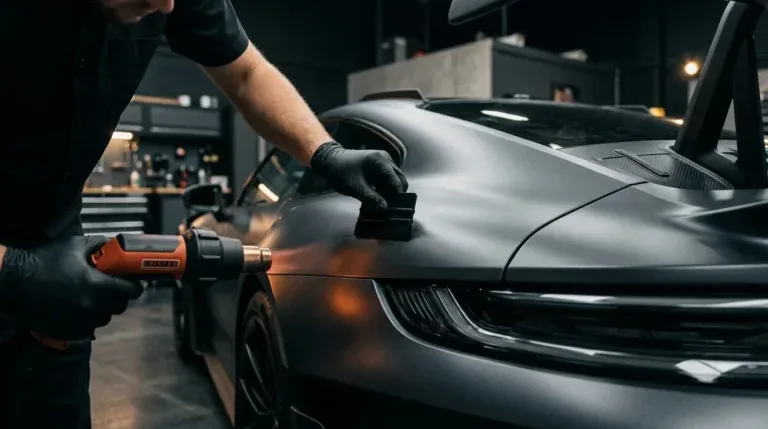
- Soft Application Glove or Squeegee: You'll need this to apply firm, even pressure as the film cools down. A soft, seamless glove (like a 3M Wrap Glove) or a felt-tipped squeegee works best, allowing you to press the film into every contour without scratching.
Step-by-Step Post-Heating Technique
Follow these steps carefully to ensure every inch of your wrap is properly set:
- Identify Your Target Temperature: This is paramount. Always, always check the film manufacturer's specifications for their recommended post-heating temperature. For most high-quality cast vinyls (e.g., 3M 2080/1080 series, Avery Supreme Wrapping Film, Oracal 970RA, Hexis Skintac, Arlon Ultimate PremiumPlus), aim for a surface temperature of 180-220°F (82-104°C). For paint protection film (PPF), which is typically thicker at 4-5 mil compared to 2.5-3 mil vinyl, the temperatures are generally lower, around 150-180°F (65-82°C). Never exceed the manufacturer's maximum recommended temperature.
- Work Systematically, Panel by Panel: Don't just focus on the tricky spots; go over the entire vehicle. Tackle one panel at a time, moving methodically to ensure every square inch of film has been properly post-heated. This includes flat surfaces, as the adhesive also benefits from full activation.
- Apply Even Sweeps of Heat: Hold your heat gun about 2-4 inches away from the surface of the vinyl. Move the gun in steady, overlapping sweeps, similar to how you would apply spray paint. The goal is to heat the area evenly. Do not hold the gun still in one spot, as this will quickly scorch, bubble, or even melt the vinyl, creating irreparable damage.
- Measure Constantly with Your IR Thermometer: As you heat, continuously use your IR thermometer to check the surface temperature of the vinyl. Heat until the targeted temperature is reached, then move to the next section. This constant monitoring is what ensures precision and prevents common mistakes.
- Focus on High-Stress Areas: While the whole wrap needs attention, give extra diligence to recessed channels (like door handle cups, mirror bases), deep curves (mirrors, bumpers, wheel arches), tight edges, and any overlaps. These are the areas most prone to lifting and shrinkage because the film was stretched most significantly during application.
- Apply Pressure While Cooling: Immediately after heating an area to the correct temperature, use your soft glove or squeegee to firmly press the film into place as it cools down. This critical step helps the adhesive grab permanently in its new, relaxed, post-heated state. The film is most pliable when warm and most adherent as it cools.
Common Post-Heating Mistakes to Avoid
Even seasoned installers can make these errors if they rush:
- Underheating: This is the most common beginner mistake. The film won't fully relax its memory, leading to future lifting and shrinkage. It’s better to slightly over-heat (within manufacturer specs) than under-heat.
- Overheating: The opposite extreme, and equally damaging. Can cause discoloration, bubbling, melting, or even a permanent loss of adhesive. This is why the IR thermometer is your best friend.
- Uneven Heating: Holding the heat gun still or moving it too quickly/slowly across different areas leads to inconsistent adhesion and potential failure spots. Smooth, deliberate movements are key.
- Skipping Areas: Thinking only the edges or stretched areas need it is a fallacy. The entire surface benefits from the adhesive activation.
Here’s a quick reference table for typical post-heating temperature guidelines:
| Film Type | Typical Post-Heat Temp Range (°F/°C) | Notes for Application |
|---|---|---|
| Cast Vinyl (e.g., 3M 2080, Avery SWF, Oracal 970RA) | 180-220°F (82-104°C) | Critical for complex curves, deep recesses. Press firmly while cooling. |
| Calendered Vinyl | 200-240°F (93-116°C) | Even more vital due to stronger "memory." Use extra care not to overheat. |
| paint protection film (PPF) | 150-180°F (65-82°C) | Lower temperatures needed. Helps activate adhesive without deforming film. |
| Specialty Films (Chrome, Textured) | Consult Manufacturer | Always check specific instructions as temperatures can vary significantly. |
Edge Sealing: The Ultimate Barrier Against the Elements
While post-heating handles the vinyl's memory and internal stresses, edge sealing is your ultimate barrier against the environment. This crucial step provides an extra layer of protection against the relentless assault of moisture, dirt, road grime, and harsh cleaning chemicals that can attack the adhesive along the exposed edges of your wrap. Neglecting this step is like building a house and forgetting to put sealant around the windows – it’s just asking for trouble.
What is edge sealing? It involves applying a specialized liquid or tape to the very perimeter of the vinyl wrap. This creates a protective, often invisible, barrier that prevents water, detergents, wax, and microscopic contaminants from creeping under the film and compromising the adhesive bond. Think of it as a final line of defense, reinforcing the most vulnerable parts of your wrap.
Why is it essential for maximum lifespan? Firstly, it directly prevents edge lift. This is particularly vital for wraps on vehicles like a Ford F-150 crew cab or any vehicle that regularly encounters rough conditions, road salt, or high-pressure washing. Those wheel arches, the lower rocker panels, and the leading edges of mirrors are constantly bombarded by road spray and debris. Without an edge seal, water and grime can slowly work their way under the vinyl, weakening the adhesive and causing the film to lift. Once it starts, it's a downward spiral, often requiring a panel re-wrap.
Secondly, edge sealing protects against chemical ingress. Many car wash soaps, degreasers, and even some waxes can be detrimental to the vinyl adhesive if they get underneath the film. An edge sealant acts as a buffer, preventing these chemicals from directly attacking the bond. This is especially true for DIYers who might not be using wrap-safe cleaning products exclusively. Thirdly, it prolongs the pristine look. Lifting edges don't just compromise the wrap's integrity; they make it look tired and unprofessional. A properly sealed edge maintains a crisp, clean appearance for much longer, ensuring your vehicle continues to make a strong visual statement.
Applying the Final Seal: Techniques and Best Practices
Just like post-heating, edge sealing requires careful attention to detail. This isn't a step you rush; it's a deliberate act to fortify your investment against the elements.
Types of Edge Sealants
- Liquid Edge Sealers: These are the most common and versatile. Products like 3M Edge Sealer 3950 or Avery Dennison Edge Sealant Pen are designed specifically for vehicle wraps. They are typically clear, fast-drying, and create a strong, flexible bond. They often come with a brush applicator or in a pen format for precise application.
- Edge Seal Tapes: Less common for full color change wraps but sometimes used for specific applications or reinforcing very high-stress areas. These are thin, often transparent tapes that are applied directly over the edge of the wrap. They require careful, precise application to avoid an unsightly line.
Step-by-Step Edge Sealing Application
- Ensure the Surface is Clean and Dry: Before applying any sealant, the edge of the wrap and the underlying paint must be absolutely clean and dry. Any dust, wax residue, or moisture will prevent the sealant from bonding effectively. Use an isopropyl alcohol (IPA) wipe to thoroughly clean the edges and let it fully evaporate.
- Apply a Thin, Even Bead: For liquid sealants, apply a very thin, consistent bead directly along the cut edge of the vinyl, slightly overlapping onto both the vinyl and the underlying paint (about 1/8 to 1/4 inch on each side). The goal is to create a seamless bridge over the cut edge. Less is more here; a thick application can look messy and even create a ridge.
- Focus on Critical Areas: While you can seal every edge, prioritize areas most exposed to moisture, abrasion, and direct impact. This includes:
- Wheel wells and fender flares
- Lower rocker panels and sills
- Door jambs and handle recesses
- Around gas caps
- Leading edges of mirrors and bumpers
- Any exposed cut edges that face forward
- Allow for Proper Curing: Refer to the manufacturer's instructions for curing times. Most liquid sealants will be touch-dry within minutes but require several hours or even a full day to fully cure before the vehicle can be washed or exposed to heavy rain.
- Inspect Your Work: Once dry, visually inspect all sealed edges. Look for any missed spots, bubbles in the sealant, or areas where the bead is uneven. Reapply sparingly if necessary.
A personal tip: for intricate areas like inside door handle recesses, I often use a very fine artist's brush with the liquid sealant. It gives me much more control than a built-in applicator and ensures a neat, barely visible seal. This level of detail is what separates a good wrap from one that truly looks factory-applied.
Maximizing Your Wrap Investment: The Long-Term View
By diligently executing both post-heating and edge sealing, you're not just completing a task; you're securing your investment. A full color change wrap on a mid-sized sedan or SUV, like a 2024 Tesla Model Y, can range from $4,200 to $5,800 depending on the finish (matte, gloss, satin, chrome) and complexity. For a larger vehicle like a Ford F-150 crew cab, you’re looking at needing 18-22 linear meters of 60-inch film, and professional installation costs can easily hit $6,000-$8,000. These aren't insignificant sums, and these final steps ensure you get the maximum 5-7+ years (or even more) of life out of that investment.
Beyond the initial application, proper maintenance plays a huge role in longevity. Once your wrap is post-heated and edge-sealed, adhere to a regular washing schedule – typically every 1-2 weeks, using wrap-safe car wash soaps and soft microfibers. Avoid harsh chemicals, automatic car washes with brushes, and high-pressure washers held too close to the edges. While most vinyl wraps don't require waxing, specific wrap-safe sealants or ceramic coatings compatible with vinyl can add an extra layer of UV and contaminant protection, further extending its life and making cleaning easier. Always choose products explicitly stated as safe for vinyl wraps or PPF.
These final touches might seem minor in the grand scheme of a full vehicle wrap, but their impact on durability and appearance is monumental. Skipping them is akin to building a beautiful wooden boat but forgetting to seal the seams – it might look great on land, but it won't hold up in the water. Whether you’re a seasoned DIY enthusiast or a professional installer, incorporating meticulous post-heating and edge sealing into your workflow is a non-negotiable step for achieving a truly long-lasting and professional finish. Your future self, and your beautiful wrap, will thank you.