Disclosure: As an Amazon Associate, we earn from qualifying purchases.
Maintaining a vehicle wrap requires specific care to prevent edge lifting, UV fading, and surface scratching, while repairing minor damage early extends film lifespan up to 5 to 7 years. Minor scuffs, edge peeling, and pinhole air bubbles can be fixed at home using a heat gun, 70% isopropyl alcohol, and precision cutting tools without replacing the entire panel. However, improper washing—such as using automated brush car washes or high-pressure sprayers held too close—causes premature adhesion failure.
Daily Maintenance Routine for Maximum Vinyl Lifespan
Proper cleaning prevents environmental contaminants like bird droppings, tree sap, and road salt from burning into the vinyl film face layer. Follow these core rules to maintain gloss, satin, and matte finishes:
- Hand Washing: Wash your wrapped vehicle every 1 to 2 weeks using a pH-neutral car shampoo (pH 6–8) free from added wax or gloss enhancers. Use a clean microfiber wash mitt with the two-bucket method to minimize surface micro-scratching.
- Drying: Immediately dry the surface with a soft microfiber drying towel or a dedicated leaf blower. Allowing tap water to dry naturally leaves mineral spots that require solvent treatment to remove.
- Spot Treating Stains: Neutralize bird droppings and bug splatter immediately. Soak stubborn deposits with warm, soapy water for 3–5 minutes before gently wiping clean with a microfiber cloth. For grease, oil, or fingerprints on matte films, wipe down using a 70% Isopropyl Alcohol (IPA) and 30% distilled water mixture.
- Touchless Wash Cautions: If hand washing is unavailable, use touchless drive-through car washes only. Avoid brush car washes completely, as mechanical bristles catch edge seams and scratch 2.5–3.5 mil vinyl surfaces.
- Pressure Washer Safety: Maintain a maximum water pressure of 2,000 PSI, keep water temperature below 80°C (180°F), use a 40-degree wide spray pattern, and keep the nozzle at least 12 inches (30 cm) away from the surface, spraying strictly perpendicular (90 degrees) to wrap edges.
Comparing Wrap Maintenance and Protection Methods
Selecting the right protective treatments prevents premature fading and maintains color vibrancy across different wrap materials.
| Care Method | Compatible Wrap Finishes | Primary Benefit | Risk / Consideration |
|---|---|---|---|
| pH-Neutral Hand Wash | Gloss, Satin, Matte, Chrome, PPF | Removes dirt without compromising adhesive edge bonds. | Requires regular effort and safe wash tools. |
| Vinyl-Specific Ceramic Coating | Gloss, Satin, Matte | Provides hydrophobic barrier and UV projection. | May alter matte finish sheen if wrong coating is applied; check manufacturer warranty guidelines. |
| 70/30 IPA Dilution Spot Wipe | Satin, Matte, Textured | Removes fingerprints, oils, and mild residue cleanly. | Excessive raw alcohol use can dry out non-laminated vinyl. |
| Traditional Paste Wax | Gloss Only (Limited) | Adds temporary slickness. | Stains matte/satin wraps permanently with white residue; avoid petroleum distillates. |
How to Repair Lifting Edges and Peeling Seams
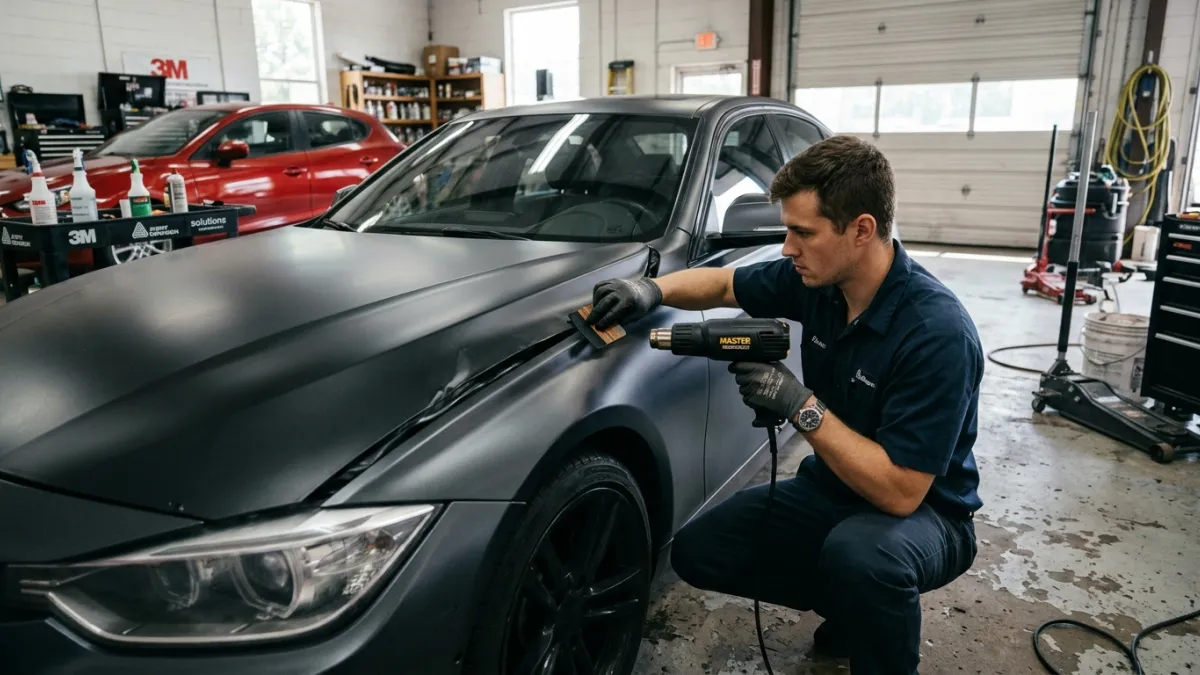
When vinyl edges lift along door handles, wheel arches, or bumper seams, dirt creeps behind the pressure-sensitive adhesive, breaking its bond. Repair lifting edges promptly using this professional step-by-step method:
3M Primer 94 1/2 Pint | Car Wrapping Application Tool

Required Tools
- Heat gun with digital temperature control
- 70% Isopropyl Alcohol (IPA) and lint-free microfiber towels
- Felt-edge squeegee
- Adhesive primer (e.g., 3M Primer 94) applied with a fine swab
- Precision craft knife or 9mm 30-degree snap-off utility blade
Step 1: Clean and Degrease the Exposed Area
Gently lift the peeling edge back slightly without overstretching the vinyl. Wrap a thin microfiber cloth around a plastic scraper, saturate it with a 70/30 IPA mix, and thoroughly clean the underside of the vinyl film and the painted vehicle surface beneath it to strip away accumulated dirt, wax, and road debris. Allow the area to dry completely for 5 minutes.
Step 2: Trim Damaged or Stretched Vinyl
If the lifted edge has stretched, curled, or accumulated dirty adhesive that cannot be cleaned, use a sharp 30-degree blade to make a clean, straight micro-trim along the loose edge. Never leave stretched, wavy vinyl in place, as it retains mechanical tension and will pop back up after heating.
Step 3: Apply Surface Primer
Using a micro-brush applicator, apply a very thin coat of adhesive promoter (such as 3M Primer 94) strictly to the painted vehicle surface under the vinyl edge—do not apply primer directly onto the face of the film. Let the primer flash off (dry) for 2 to 3 minutes until it feels tacky to the touch.
Step 4: Re-heat and Post-Heat Seal
SEEKONE 1800W Heat Gun with Carry Case 122℉-1112℉ Variable Temp for Crafts

Warm the lifted vinyl edge with your heat gun set to approximately 60°C–70°C (140°F–158°F) for 3–5 seconds to regain film pliability. Using a felt squeegee, press the edge down firmly working from the solid inner area toward the outer edge to evacuate all air. Finally, perform a post-heating cycle by heating the repaired edge to 85°C–95°C (185°F–203°F) using an infrared thermometer to melt the memory of the vinyl cast film, locking the repair permanently in place.
Fixing Scuffs, Air Bubbles, and Small Patch Repairs
Light Scuffs and Surface Scratches
Cast vinyl films (like 3M 2080 or Avery SW900) feature thermo-plastic memory properties. Light hairline scratches on gloss wraps can be repaired using a heat gun set to medium heat held 6 inches away. Pass the heat gun slowly across the scratch; as the film reaches 60°C–70°C, the clear protective top layer will relax and self-heal surface scuffs. Note: Do not overheat matte or satin films, as excessive heat alters the factory sheen and creates unwanted gloss spots.
Trapped Air Bubbles
Do not pop bubbles by slicing a line into the wrap. Instead, take a fine sewing needle or air-release tool and pierce a single microscopic hole at the outer edge of the bubble. Gently warm the bubble for 2 seconds with a heat gun, then push the trapped air out toward the pinhole using your thumb or a felt squeegee.
Patching Punctures or Tears
For stone chips or tears under 1 inch in size on lower rocker panels, a cut patch avoids costly single-panel re-wrapping:
- Clean the damaged area thoroughly with 70% IPA.
- Cut a piece of leftover identical vinyl material into a circle or rounded rectangle slightly larger than the damage. Avoid sharp corners on patches, as squared edges peel easily under wind resistance.
- Position the patch directly over the damaged spot, squeegee down firmly with low heat, and post-heat the edges to seal.
Chemical Guys, Meticulous Matte & Satin Finish Detailer & Sealant, 16 oz

Frequently Asked Questions
Can I ceramic coat a wrapped car to make maintenance easier?
Yes, applying a ceramic coating specifically formulated for vinyl wraps or paint protection film (PPF) adds strong hydrophobic protection and prevents UV fading. Ensure the coating does not contain heavy solvents that degrade pressure-sensitive adhesives, and confirm compatibility if maintaining manufacturer warranties.
How long should I wait to wash my car after getting it wrapped?
Wait at least 72 hours (3 full days) after installation before washing your wrapped vehicle. This allows the pressure-sensitive adhesive system to form a complete bond to the painted substrate.
When should a damaged wrap panel be replaced instead of repaired?
Replace the full panel wrap if the vinyl is cracked from old age, if a tear exceeds 2 inches in a high-visibility center panel (like the hood), or if the underlying paint is exposed across a large area. Attempting large patches on top panels results in visible seams and uneven weathering.