As someone who's spent well over fifteen years submerged in the world of automotive vinyl, I've seen firsthand the incredible transformations a well-executed car wrap can achieve. From subtle color changes to intricate custom graphics, wraps offer an unmatched blend of personalization and paint protection. But before the magic happens, every enthusiast, car owner, and small fleet operator faces a pivotal decision: should you tackle this project yourself, or is it a job best entrusted to professional hands?
This isn't just about saving a few bucks or enjoying a weekend project. It’s about making an informed investment – an investment of time, money, skill, and ultimately, the long-term appearance and protection of your vehicle. The allure of DIY is powerful, promising cost savings and the satisfaction of a job done with your own hands. However, the reality of achieving a flawless, durable finish with complex modern vinyls often hides a steeper learning curve and potential pitfalls than many beginners anticipate. On the flip side, professional installation offers guaranteed quality, but it comes with a higher upfront price tag. So, how do you truly weigh these options?
My goal here isn't to discourage DIY or blindly push professional services. It's to equip you with the knowledge to assess your project realistically, understand the true costs involved in both scenarios, and ultimately make a decision that aligns with your desired outcome, budget, and skill level. Let's break down the tangible and intangible factors that define a successful wrap project, whether you're wielding the squeegee or hiring the experts.

Deconstructing the DIY Car Wrap: More Than Just Material Cost
The primary draw of DIY wrapping is almost always the perceived cost savings on labor. While it's true you won't pay a shop's hourly rate, the "free labor" comes with its own set of hidden costs and significant risks that many beginners overlook. Let's peel back the layers and examine what a DIY project truly entails.
The Real Financial Outlay for DIY
- Material Costs: For a full color change on a mid-sized sedan like a 2020 Honda Civic, you'll typically need around 15-18 linear meters of 60-inch wide film. For a larger vehicle, say a Ford F-150 SuperCrew, expect to use 22-25 linear meters. High-quality cast vinyl (the premium, heat-activated film that conforms beautifully to complex curves without shrinking back), such as 3M 2080/1080 series, Avery Dennison Supreme Wrapping Film, or Oracal 970RA, can range from $15-$30 per linear foot. So, for that Civic, you're looking at $750-$1,500 just for the film. Beginners should always factor in at least 15-20% extra material for mistakes, cuts, and re-dos. If you opt for cheaper calendered vinyl (a more affordable, stiffer film better suited for flat surfaces), the cost is lower, but its limited conformability makes it unsuitable for complex vehicle curves and its longevity is typically shorter (2-4 years vs. 5-7+ for cast).
- Tool Investments: To do the job right, you can't just rely on a utility knife and a credit card. A basic DIY kit should include:
- Professional squeegee set (various hardnesses, felt edge options): $20-$50
- Variable temperature heat gun (essential for stretching and post-heating): $50-$150 (aim for one with precise temperature control, e.g., reaching 200-220°F for optimal vinyl activation).
- Sharp snap-off blade knife (always use fresh blades!): $10-$20
- Knifeless tape (for clean cuts without touching paint): $20-$40 per roll
- Surface prep cleaner (IPA solution, degreaser, clay bar): $20-$50
- Microfiber towels, gloves, magnets, application fluid: $30-$60
- A decent lighting setup and a dust-free, temperature-controlled environment are also crucial, often overlooked "costs."
Total tool investment can easily hit $150-$300, which you might only use once or twice.
- Time & Learning Curve: A professional installer can wrap a full sedan in 1-3 days. For a dedicated DIYer, expect a full wrap to consume several weekends, potentially weeks, especially if it's your first attempt. This involves extensive research, practice, and often, frustrating re-dos.
The Unseen Risks of DIY Wrapping
Beyond the direct financial costs, there are significant risks associated with DIY projects:
- Material Waste: As mentioned, beginners often waste a substantial amount of expensive film due to miscuts, improper stretching, contamination, or irreversible bubbles. This quickly negates initial "savings."
- Subpar Finish Quality: Achieving a truly smooth, bubble-free, and crease-free finish on complex curves (like bumpers, mirrors, or deep body lines) is incredibly challenging. Common issues include:
- Bubbles & Lifting: Trapped air or improper adhesion leading to premature failure.
- Shrinkage: Insufficient post-heating (heating the film to 200-220°F after application to set its memory) can cause edges to lift and corners to pull back over time.
- Contamination: Dust or dirt trapped under the film creates unsightly bumps and can compromise adhesion.
- Blade Damage: Slips of the knife can scratch or cut through your vehicle's original paint, a permanent and costly mistake.
- Paint Damage During Prep or Removal: Aggressive cleaning chemicals, improper masking, or using the wrong tools during removal can damage clear coats or pull paint, especially on older vehicles or those with aftermarket paint jobs.
- Shortened Longevity: A poorly installed wrap, even with premium materials, will not last as long as a professional job. Expect 2-3 years instead of the potential 5-7+ years, meaning you'll be re-wrapping sooner and spending more in the long run.
When DIY *Might* Make Sense (for Learning, Not Perfection): If your primary goal is to learn the process, and you're working on a low-stakes project where perfection isn't paramount, DIY can be a valuable learning experience. Think very small, flat areas, or interior accent pieces. For example, wrapping a flat dashboard trim panel, or applying a small racing stripe to a flat hood. These projects typically use small pieces of film, minimize complex curves, and failures are less visible or costly to correct. This is fundamentally different from attempting to wrap an entire exterior panel or a full vehicle.
The Professional Advantage: Unpacking the Value of Expert Installation
Hiring a professional wrap shop isn't just about paying for someone else to do the work; it's an investment in expertise, efficiency, and a guaranteed, high-quality outcome. The value proposition extends far beyond the initial quote.
The Pillars of Professional Value
- Unmatched Expertise and Experience: A seasoned installer has wrapped hundreds, if not thousands, of vehicles. They understand the nuances of different film types (e.g., how 3M 2080 reacts differently to heat and stretch compared to Avery SWF), intricate vehicle geometries, and the best techniques for seamless application. They can handle deep recesses, complex curves, and tight corners with precision that a DIYer simply cannot match without extensive practice.
- Guaranteed Quality Finish: Professionals aim for perfection. This means a completely bubble-free surface, seamlessly tucked edges, and virtually invisible seams. They use specific techniques like relief cuts and post-heating (heating all stretched areas to the film's memory temperature, typically 200-220°F, to prevent shrinkage and lifting) to ensure the wrap adheres flawlessly and lasts.
- Access to Premium Materials & Specialized Tools: Shops buy film in bulk, often getting better pricing, and have access to a wider array of specialty films (chrome, textured, metallic flakes) that might be harder for individuals to source. They also utilize industry-specific tools such as:
- Large format plotters (for precision cutting of graphics and panel pieces).
- Infrared heaters (for consistent and gentle heating over large areas).
- Specialized squeegees for different contours and film types.
- 3M rivet brushes, edge sealers, and sophisticated cleaning systems to ensure optimal adhesion and longevity.
- Efficiency and Convenience: Your vehicle downtime is significantly reduced. Instead of weeks, a full professional wrap on a vehicle like a 2024 Tesla Model Y typically takes 2-4 days. This is crucial for daily drivers or small business fleets.
- Warranty and Peace of Mind: Reputable shops stand behind their work. Most offer a warranty on both materials (as per manufacturer, usually 3-7 years) and their labor (typically 1-3 years). This means if an edge lifts or a bubble appears due to installation error, they'll fix it at no additional cost.
- Proper Surface Preparation & paint protection: Professionals adhere to strict prep protocols, including thorough washing, clay barring, and degreasing with specific solutions (like IPA or specialty surface cleaners) to ensure perfect adhesion. They also use techniques to protect your paint during installation and ensure clean, residue-free removal when the time comes.
Professional Installation Cost Breakdowns (2025-2026 Estimates)
The cost of a professional wrap varies significantly based on vehicle size, film type, and complexity. These are general estimates for quality work:
- Full Color Change (Standard Gloss/Matte Cast Vinyl):
- Small car (e.g., Mazda Miata): $2,800 - $4,000
- Mid-size sedan (e.g., Honda Accord, Tesla Model 3): $3,800 - $5,500
- Large SUV/Truck (e.g., Chevy Tahoe, Ford F-150): $4,800 - $7,500+
These prices often include basic door jamb wraps (not full interiors) and standard finish films from brands like 3M (2080 series) or Avery Dennison (Supreme Wrapping Film).
- Specialty Films (Chrome, Textured, Color-Shift): Add 20-50% to the above prices due to higher material cost and increased installation difficulty.
- Paint Protection Film (PPF): This is a thicker (typically 8-10 mil), self-healing clear film designed to protect paint from chips, scratches, and road debris. Due to its thickness and complex installation, PPF is almost exclusively a professional job.
- Full front end (bumper, hood, fenders, mirrors): $1,500 - $3,000
- Full vehicle wrap: $5,000 - $9,000+ (depending on vehicle size and film brand like Xpel Ultimate Plus or SunTek PPF).
- Chrome Deletes & Small Accents: While tempting for DIY, professional chrome deletes (wrapping chrome window trim, badges, or grille elements in black vinyl) ensure crisp lines and long-term adhesion. Cost: $200 - $700 depending on vehicle and complexity.

Making the Smart Choice: Project Scope, Vehicle Value, and Your Comfort Zone
Now that we've laid out the realities of both DIY and professional wrapping, how do you decide what's right for your specific situation? It boils down to a strategic assessment of your project's scope, the value of your vehicle, and your personal comfort level with risk.
When to Absolutely Hire a Professional:
- High-Value or Brand New Vehicles: If you've just purchased a new car, particularly a luxury vehicle or a high-performance model, or if your vehicle holds significant sentimental or resale value, the risks of DIY are simply too high. Protecting that factory paint finish and ensuring a flawless aesthetic demands professional skill. Imagine a full color change on a new Porsche 911 – this is not the place for a first-time DIY attempt.
- Full Color Changes & Large Exterior Panels: Wrapping an entire vehicle or even a single large panel (like a hood, roof, or door) involves significant film manipulation, stretching, and precise trimming around edges and components. These are complex tasks where professional experience prevents issues like "fingering" (wrinkles that don't lay flat), severe stretch marks, or lifting edges within weeks.
- Paint Protection Film (PPF) Installation: PPF is a unique beast. Its thickness (often 8-10 mil compared to vinyl's 2.5-3.5 mil) makes it incredibly difficult to stretch and conform without specialized tools and techniques. The material itself is very expensive, making mistakes costly. If you want true paint protection, PPF is a professional-only job.
- Complex Designs & Specialty Films: Intricate graphics, multi-color wraps, chrome, textured, or color-shift films require advanced techniques. Chrome vinyl, for instance, is notoriously difficult to work with due to its low conformability and tendency to show imperfections. Achieving a mirror-like finish with chrome or seamless transitions with custom graphics is a hallmark of professional work.
- Commercial Vehicle Branding: For business vehicles, your wrap is a direct representation of your brand. It needs to be perfect, durable, and consistent. Professional installers ensure high-resolution graphics, correct branding colors, and a finish that withstands daily wear and tear for years, protecting your company's image and investment.
- When You Value Time & Warranty: If your vehicle is a daily driver and you can't afford weeks of downtime, or if you want the peace of mind that comes with a labor and material warranty, professional installation is the clear choice.
When DIY Can Be Considered (with Caution and Realistic Expectations):
DIY wrapping is best approached as a learning experience on low-stakes projects, not as a cost-cutting measure for a high-visibility outcome. If you have significant free time, patience, access to a clean environment, and are willing to accept imperfections and potential material waste, consider:
- Interior Trim Pieces: Small, removable, mostly flat interior panels (e.g., center console inserts, dashboard strips) are excellent for practicing film handling, squeegee techniques, and trimming.
- Small, Flat Decals or Stripes: Applying pre-cut vinyl graphics or simple stripes to a very flat surface, like a glass window or a completely flat section of a hood (not a curved one), can be a good entry point.
- Headlight/Taillight Tinting: While requiring some skill, these smaller, often convex surfaces can be a manageable DIY project using specialty tint films, as long as local regulations are checked.
- Accent Wrapping on a Spare Part: If you have an old bumper or mirror cap lying around, practice on that. It removes the risk to your actual vehicle.
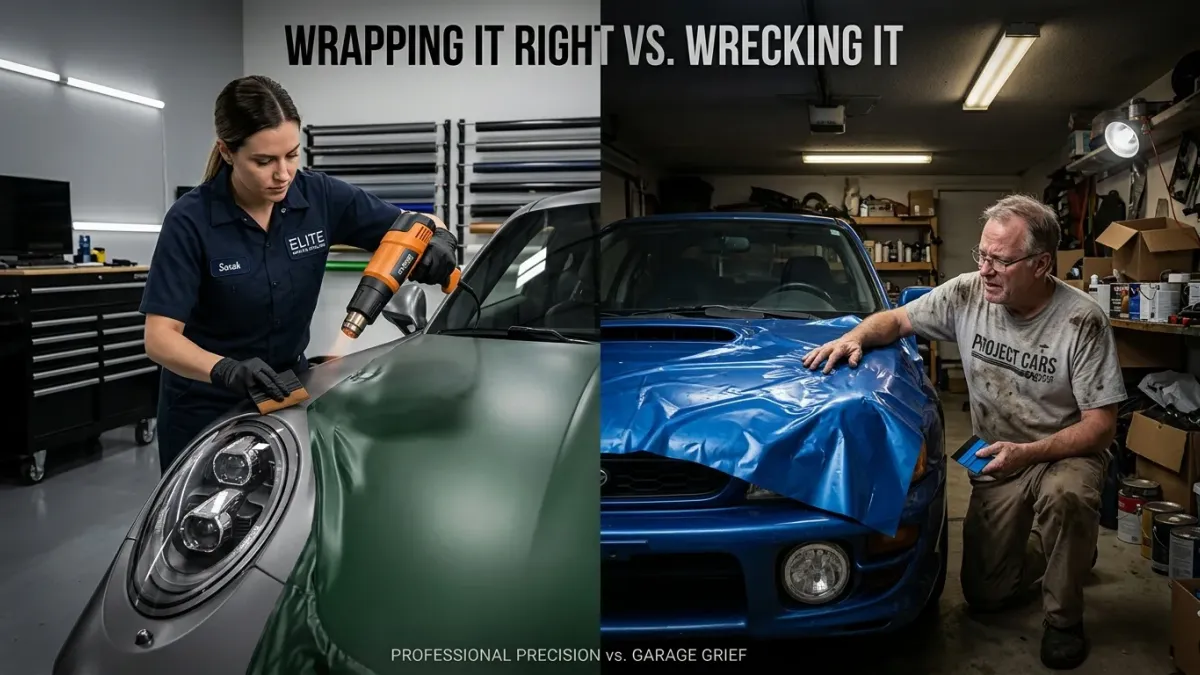
For any significant exterior wrap project, from a single fender to a full vehicle, the investment in a professional installer nearly always pays dividends in terms of quality, longevity, and overall satisfaction. The "savings" from DIY often evaporate with wasted material, re-do costs, and a compromised finish that doesn't last. My advice, honed over years of watching both successes and failures, is simple: assess your project honestly. If the outcome matters, and you want your vehicle to look its best and stay protected for years, trust a professional.