Quick answer: To wrap PPF corners without lifting, establish a clean anchor point, use a 10-15% Isopropyl Alcohol (IPA) tack solution to lock down the corner peak, and stretch the film evenly across the complex curve rather than pushing excess material into the corner. Relieve material tension by heating the film body slightly with warm water or a light heat gun pass (120-140°F), squeegee out all fluid toward the edges, and dry-tack the wrapped relief edges with a squeegee before final post-heating.
Understanding Polyurethane Behavior on Compound Surfaces
To successfully wrap complex panels, you must understand how clear film reacts under mechanical tension compared to vinyl. Vinyl wraps are generally 2.5 to 3.5 mil thick and soften dramatically with heat, allowing high stretch limits. In contrast, premium paint protection films—such as XPEL Ultimate Plus, SunTek Reaction, 3M Scotchgard Pro, or STEK DYNOshield—measure between 7 to 10 mil thick (including topcoat and adhesive layers). Polyurethane possesses strong structural memory; if you overstretch it to force it into a recess, the tension remains stored in the sheet and will pull the film away from the paint over time.
When working with compound curves—surfaces that curve along two axes simultaneously— excess film gathers in deep structural folds known as "fingers." Standard dry vinyl techniques will not work here because PPF requires a fluid barrier to slide into position before locking down. Attempting to force these fingers down using pure force flattens the adhesive, causing permanent silvering marks, water blisters, or edge failure within weeks of exposure to thermal cycling.
Managing this geometry requires strategic distribution of stretch, known in professional shops as "palm tension." Rather than pulling localized points of the film hard, you spread the tension evenly over the entire body of the panel. This keeps the physical memory of the polyurethane balanced across several feet of surface area instead of concentrating stress directly along the vulnerable outer edge of a bumper or corner trim.
Installer tip: If you see horizontal lines or cloudy haze under the clear layer while stretching over a tight corner, you have exceeded the clear topcoat’s yield limit (usually around 20-25% maximum stretch). Immediately lift the sheet, flush the area with fresh slip solution, apply warm water (around 120°F) to relax the polyurethane memory, and re-distribute tension outward across the flatter areas of the panel.
How to Wrap PPF Corners and Deep Sharp Recesses
Corners are the most common failure point for DIYers and beginner installers alike. When learning how to wrap PPF corners on sharp fenders or aggressive aerodynamic splitters, success relies entirely on fluid management and strategic anchoring. You cannot wrap a corner while the entire film sheet is floating on slip solution, nor can you pull a dry sheet without stretching the perimeter beyond its structural tolerance.
Start by floating the sheet over the entire panel using a standard slip mixture (typically 2-3 mL of pure baby shampoo or specialized film slip per 32 oz of distilled water). Position the film so that you have approximately 1 to 2 inches of overhang around the entire corner perimeter. Locate the highest stress point of the corner, lift the film back slightly, and spray the underside of that anchor zone with your tack solution (a mixture of 10-15% Isopropyl Alcohol to 85-90% distilled water). Squeegee out the fluid at this central anchor zone to create a firm friction point on the body line.
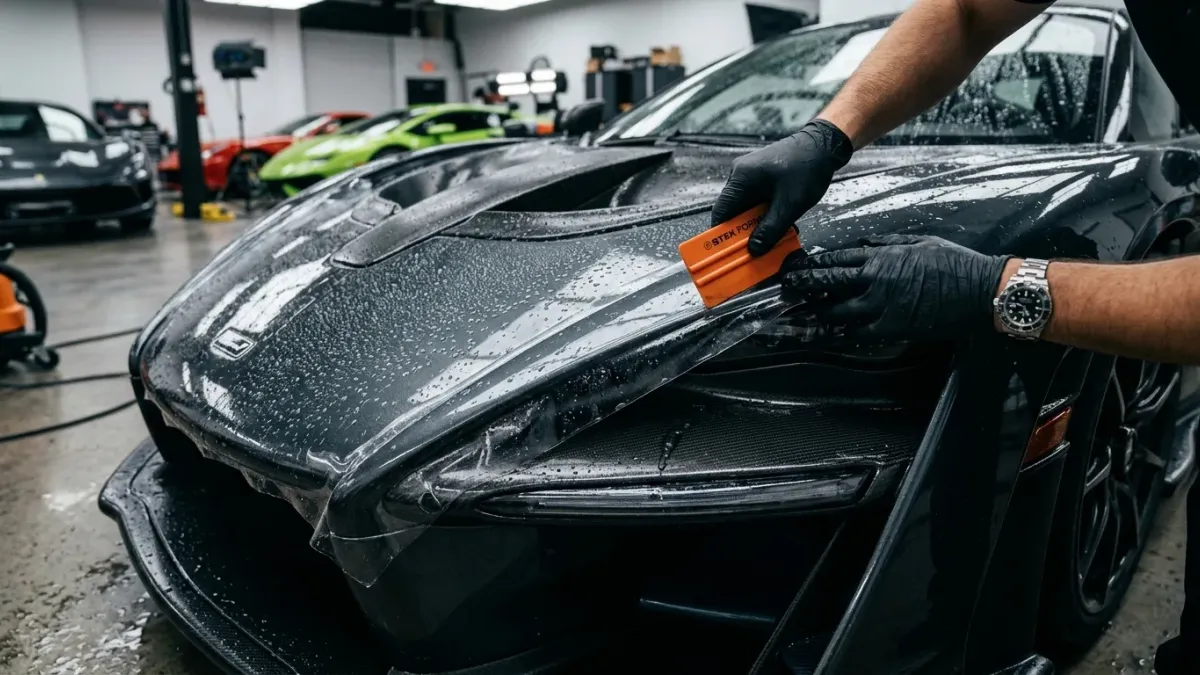
Once anchored, work the excess fluid away from the apex of the corner. Pull the excess material off the edge of the panel at a 45-degree angle away from the point of the corner, stretching the bulk of the film slightly over the wider face of the panel rather than pulling directly on the tight corner itself. Use soft stroke overlays with a damp rubber squeegee (like a blue or yellow Fusion card) to evacuate fluid completely. Finally, wrap the remaining film around the backside of the lip only after flushing out all slip solution with pure distilled water or tack solution.
- Flush: Clean all soap residue from behind the corner using a direct mist of pure water or tack solution.
- Tack: Secure the flat area 2 inches inside the corner first so the film cannot pull back.
- Relieve: Pull tension outward off the corner tip, spreading the tension evenly across adjacent flat surfaces.
- Seal: Press the edge down firmly using a microfiber-wrapped hard card, applying steady pressure along the edge profile.
Advanced Stretching Techniques and Fluid Ratios
Working on multi-curved panels like mirror caps or sculpted front air intakes requires mastering the balance between your slip solution and tack solution. The slip solution allows the film to slide effortlessly without grabbing, while the tack solution neutralizes the soap surfactant, allowing the pressure-sensitive acrylic adhesive to bond instantly to the clear coat.
For complex surfaces, standard 50/50 water-to-alcohol tack solutions are often too aggressive and cause instant adhesive shock, creating visible glue lines under transparent film. Lowering your alcohol concentrate to roughly 10% gives you enough working time to squeeze out trapped liquid while still achieving rapid edge grab on complex contours. When wrapping large commercial vehicles or working with wider sheets, ensuring clean surface prep with dedicated clay bars and wax-free panel wipes prevents edge lifting.
When custom cutting or utilizing pre-cut computer software templates (such as XPEL DAP or 3M Pattern Repository), always evaluate whether a panel requires dry heat or warm water relief. While vinyl installers rely on dry heat guns up to 200°F, PPF responds much better to hot water flushes (130°F to 150°F). Pouring warm water over a stretched area relaxes the topcoat instantly, softening the TPU (Thermoplastic Polyurethane) without risk of burning or melting the clear coat finish.
| Film Type / Application | Thickness (Mil) | Max Safe Stretch | Ideal Slip / Tack Solution | Expected Longevity |
|---|---|---|---|---|
| Standard Cast Vinyl (e.g., 3M 2080, Avery SW900) | 3.2 mil | 30% - 40% | Dry Application Only | 5 - 7 Years |
| Premium TPU PPF (e.g., XPEL Ultimate, SunTek Reaction) | 7.5 - 8.5 mil | 15% - 20% | Slip: Soap/Water | Tack: 10% IPA | 7 - 10 Years |
| Heavy-Duty / Track PPF (e.g., STEK DYNOshield / 10 mil) | 10.0 mil | 10% - 15% | Slip: Heavy Soap | Tack: 12% IPA | 7 - 10 Years |
Edge Trimming, Wrapping, and Post-Heating Workflows
Once you have successfully squeegeed the body of a compound panel and anchored the outer corners, your final phase determines whether the wrap lasts 10 years or fails on the first car wash. Proper edge handling is critical when working with raw bulk rolls (typically 60-inch by 50-foot rolls) or extending pre-cut patterns for wrapped edges. If you leave exposed edges directly along high-impact paint seam margins, road debris and water pressure will slowly lift the film layer.
When trimming bulk PPF off a wrapped edge, always use a fresh 30-degree snap-off blade (such as Olfa stainless steel blades). Score the top 50% of the film thickness without letting the razor blade edge touch the factory paint surface. Once scored, gently pull the excess waste film away at an angle; the film will tear cleanly along your score line. Leave approximately 1/4 inch (6mm) of material past the body edge if you intend to wrap the film around door margins or hood lips.
Before folding edges around the back of a panel, inspect for trapped moisture pockets. Use a firm microfiber-wrapped squeegee to roll the film around the lip. Once rolled, use your heat gun on a low setting (180°F to 220°F) to perform post-heating. Post-heating PPF does not melt the material; instead, it evaporates remaining microscopic moisture layers underneath the film and bakes out residual strain, setting the memory of the film to its newly wrapped shape.
For more detailed insights on maintaining film performance over time, check out our guide on proper PPF maintenance routines. If you are comparing overall costs between color change wraps and clear protection, review our complete wrap vs PPF pricing guide to make the right choice for your vehicle.
Frequently Asked Questions
How do I prevent fingers from forming on the edges of PPF?
Fingers occur when there is excess film material clustered over a short radius. To eliminate them, do not squeegee directly into the finger. Lift the film, apply slip solution, pull the film outwards with balanced palm pressure to spread the excess material over a wider area, and tack down the outer perimeter using an IPA tack solution before squeegeeing the center out.
Can I use a heat gun on PPF like I do with vinyl wrap?
Yes, but with caution. High dry heat can burn or scorch the self-healing topcoat layer of polyurethane film. Keep heat gun temperatures low to moderate (120°F–150°F for working film, up to 220°F for final post-heating edges) and keep the heat gun moving continuously. Many professionals prefer flushing stretched areas with hot water (130°F–140°F) instead of dry air heat.
Why won't the edges of my PPF stick around tight corners?
Edges usually refuse to stick because soap slip solution remains trapped under the edge, or the paint surface behind the panel was not properly degreased. Flush behind the film edge thoroughly with pure distilled water or a 10% IPA solution to remove all surfactant soap, allow it to dry for 30–60 seconds, and roll the edge down using a soft, lint-free microfiber towel.
How far can I safely stretch clear protection film on complex curves?
Most high-end polyurethane protection films (7.5 to 8.5 mil thick) can safely stretch between 15% and 20% without compromising optical clarity or longevity. Overstretching beyond 20% causes structural topcoat failure, visible stretch marks (silvering), and drastic reduction in film thickness over impact zones.
For best results on your next project, start by testing your slip and tack ratios on a small panel before tackling complex compound bumpers. Investing in high-grade 8-mil TPU film alongside proper pattern prep will ensure your corners lay down flat, cleanly wrapped, and bubble-free for years to come.