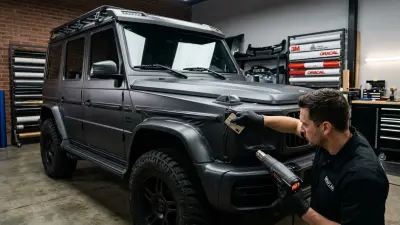
Modern vehicle design has shifted dramatically over the last decade, leaving bright silver factory accents feeling out of touch with today's clean, aggressive styling trends. Executing a chrome delete on a car is the process of vinyl wrapping or replacing original chrome trim—such as window surrounds, front grille inserts, emblems, and tailgate strips—with matte, satin, or gloss black finishes. Whether you want to modernize a daily driver or eliminate blinding glare from high-gloss factory trim, blacking out shiny accents has become one of the most effective and affordable modifications you can make to your vehicle.
Quick answer: A chrome delete on a car uses high-grade automotive cast vinyl (such as 3M 2080 or Avery SW900) to cover bright factory trim, delivering a sleek, modern aesthetic while protecting underlying surfaces. Expect a professional installation to cost between $300 and $800 depending on the vehicle, or around $60 to $120 in materials if you choose the DIY route. When properly installed, premium cast film lasts 5 to 7 years without peeling or fading.
What is Chrome Delete on a Car and Why Is It So Popular?
Every automotive era has its defining stylistic markers. While excessive brightwork dominated luxury cars for decades, modern aesthetics prioritize integrated, stealthy trim that complements body lines rather than interrupting them. Performing a chrome delete on a car allows owners to replace reflective factory trim around window frames, grilles, side mirrors, door handles, and hatch strips with subtle black or color-matched accents. This simple change alters the profile of a vehicle, giving standard sedans, trucks, and crossovers a custom, factory-optioned appearance often reserved for high-performance packages like Audi's Black Optic or BMW's Shadowline trim.
Beyond visual enhancements, vinyl wrapping your factory chrome provides a durable barrier against environmental damage. OEM plastic chrome trim is notorious for oxidation, water spotting, pitting, and rock-chip damage over time. Applying high-performance vinyl film shields these vulnerable components from UV radiation, harsh car wash chemicals, and road salts. When it comes time to sell or return a leased vehicle, you can easily remove the vinyl to reveal perfectly preserved factory trim underneath.
Another major reason for its popularity is the versatility of vinyl finishes available today. While gloss black remains the top choice for replicating factory optics, options like satin black offer a refined, low-glare appearance that pairs exceptionally well with metallic paintwork. For those looking to upgrade their exterior protection further, combining a trim blackout with paint protection film (PPF) on the front bumper ensures your entire front fascia stays immune to highway rock debris.
Choosing the Best Vinyl for a Chrome Delete
Selecting the correct material determines whether your wrap lasts seven years or fails after seven weeks. The automotive wrap industry relies primarily on two types of vinyl: cast and calendered. Understanding the technical differences between these materials is critical before buying supplies or attempting an installation on tight trim components.
Cast vinyl is the absolute gold standard for chrome delete applications. Manufactured by pouring liquid polymer onto a casting sheet, this 2.5 to 3.5 mil thick film experiences zero liquid tension during production. As a result, cast film has no structural memory, allowing it to stretch, conform to severe compound curves, and remain stable under extreme temperature fluctuations without pulling back or shrinking. In contrast, calendered vinyl (typically 4.0 to 6.0 mil thick) is extruded through high-pressure rollers. This manufacturing process leaves internal stress in the material, causing it to shrink back toward its original flat shape when exposed to outdoor heat, inevitably leading to edge lifting on window trim.
| Feature / Specification | Cast Vinyl (Recommended) | calendered vinyl (Avoid for Trim) |
|---|---|---|
| Typical Thickness | 2.5 – 3.5 mil (0.063 – 0.088 mm) | 4.0 – 6.0 mil (0.101 – 0.152 mm) |
| Conformability | Exceptional (Recesses, tight corners, curves) | Poor (Flat surfaces or mild curves only) |
| Expected Lifespan | 5 – 7+ Years (Outdoor rating) | 1 – 3 Years max |
| Top Industry Brands | 3M 2080, Avery SW900, Oracal 970RA, KPMF | Unbranded rolls, generic craft vinyls |
| Average Material Cost | $60 – $120 for a full trim kit | $20 – $40 for standard rolls |
When sourcing material, stick exclusively to premium brands. 3m 2080 series features a protective cap layer on gloss finishes that prevents squeegee scratches during application, while Avery Dennison SW900 offers unmatched initial tack forgivingness, making it highly recommended for beginners. If you plan to calculate material requirements for a larger project or a full vehicle blackout, our comprehensive guide on how much vinyl wrap you need breaks down square footage by vehicle size.
Step-by-Step DIY Chrome Delete Installation Guide
Executing a clean chrome delete on a car at home requires patience, a clean environment, and specific technique. Follow this proven step-by-step workflow to achieve seamless, bubble-free results that hold up over time.
Step 1: Deep Cleaning and Surface Preparation
Contamination is the primary cause of premature edge lifting. Wash the vehicle thoroughly, paying extra attention to the rubber weather stripping surrounding the window trim. Once dry, wipe down every inch of chrome using a 70% isopropyl alcohol (IPA) solution and a lint-free microfiber towel. Slide the towel underneath the rubber weather seals to pull out hidden dirt, wax residues, and road grime that could prevent the vinyl adhesive from bonding to the edge of the metal.
Step 2: Surface Preparation with Knifeless Tape
To avoid scratching your vehicle's factory paint or clear coat with a razor blade, lay down 3M knifeless tape along the body seams adjacent to the chrome trim. Position the embedded filament thread directly along the gap where you want your clean cut to occur. For straight sections like window channels, standard 1/2-inch or 2-inch tape rolls cut to size work best.
Installer tip: When wrapping window trim, never stretch the vinyl over the edge of the metal trim into the rubber channel. Instead, feed 2-3 mil of slack into the crevice using a soft plastic tucking tool before heating. If you bridge the gap under tension, summer heat will shrink the vinyl, snapping it back out of the recess and exposing silver chrome within months.
Step 3: Application, Squeegee Work, and Trimming
Cut your vinyl strip slightly larger than the trim section (leave a 1-inch overhang on all sides). Peel back the release liner and position the film softly over the chrome. Using a felt-edge squeegee at a 45-degree angle, work from the center outward to push air through the air-release channels embedded in the adhesive. Pull your Knifeless tape thread through the vinyl to create an exact, scratch-free edge, or carefully trim the excess using a fresh 30-degree snap-off razor blade along the rubber weather seal.
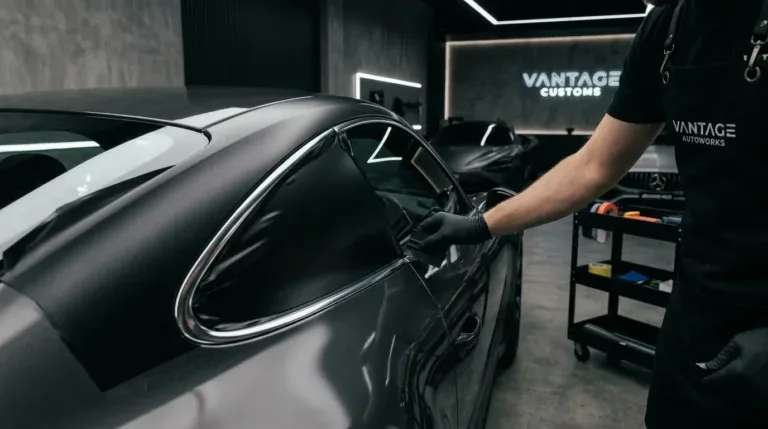
Step 4: Post-Heating for Long-Term Adhesion
Once trimmed and tucked, you must post-heat the installation. Using a heat gun set between 180°F and 200°F (82°C to 93°C), pass heat uniformly across all trimmed edges and recessed zones. Post-heating resets the memory of cast vinyl to its new shape and fully activates the pressure-sensitive adhesive, ensuring long-term edge security through heat waves and winter freezes. For more details on heat gun techniques, explore our detailed breakdown on essential vinyl wrap installation tools.
Chrome Delete Cost Breakdown: DIY vs. Professional Installation
Understanding the costs associated with a chrome delete helps you decide whether to tackle the project yourself or hire a professional wrap shop. Pricing varies depending on the complexity of the trim, total surface area, and labor rates in your region.
- DIY Material & Tool Setup ($80 – $150): Includes a 25 ft x 1 ft roll of premium 3M 2080 or Avery SW900 cast film ($45–$70), 3M knifeless tape ($15–$25), felt squeegee set ($10), 70% IPA ($5), and a dual-temperature heat gun ($25–$40).
- Professional Window Trim Delete ($300 – $550): Covers all side window surrounds. Sedan window trim typically takes a professional installer 2 to 4 hours due to intricate corners and tight rubber seals.
- Full Vehicle Exterior Chrome Delete ($600 – $1,200+): Includes window trim, front grille surrounds, front/rear bumper valances, side mirror accents, door handles, and rear tailgate badging. High-end luxury SUVs or complex truck grilles require extensive dismantling, pushing labor costs toward the higher end.
When evaluating quotes, ensure the shop uses 100% cast wrapping films and provides an edge warranty covering lifting or bubbling for at least 1 to 3 years. Cheap shops using low-grade monomeric films may offer $150 full deletes, but those films often crack, fade, or bake into the trim, damaging the finish underneath.
Maintenance and Longevity Tips for Blacked-Out Trim
To maximize the 5 to 7-year life expectancy of your chrome delete, follow a proper maintenance schedule. Hand washing using pH-neutral car soaps is strongly recommended. Avoid automated drive-through car washes that use stiff spinning brushes, as high mechanical friction can catch vulnerable vinyl edges around window seals and lift them instantly.
If you use a pressure washer, keep the spray nozzle at least 12 to 18 inches away from wrapped trim, and never spray directly perpendicular to a cut vinyl edge. Apply a spray-on vinyl sealant or ceramic coating designed for matte/satin/gloss wraps every 3 to 6 months. This extra layer prevents harsh UV damage, eliminates water spots, and keeps dirt from bonding to the porous structure of satin or matte black films.
Should you ever decide to change aesthetics or return a vehicle at lease end, removal is straightforward. Gently heat the vinyl to approximately 120°F (49°C) to soften the adhesive, then peel the film back slowly at a 45-degree angle. Premium cast adhesives peel clean off factory chrome without leaving stubborn residues or damaging the trim surface beneath.
Making the Right Decision for Your Vehicle
If you have steady hands, basic tools, and patience, tackling a DIY window trim blackout using a 3M 2080 or Avery SW900 kit is an inexpensive weekend project that offers high visual impact. However, if your car features intricate honeycomb front grilles, recessed tailgate trim, or delicate badging, outsourcing the job to an experienced wrap professional guarantees precise edges and long-lasting durability without risking scratches to your factory paint.
Frequently Asked Questions
Is a chrome delete on a car permanent?
No, a chrome delete performed with automotive vinyl wrap is completely reversible. The film protects the underlying factory chrome and can be cleanly peeled off at any point without damaging original finishes or leaving permanent adhesive residue.
Can you put a car with a chrome delete through an automatic car wash?
Touchless automatic car washes are generally fine, but you should completely avoid brush-style automated car washes. The spinning bristles can catch the thin edges of trimmed window vinyl, causing edges to peel or tear prematurely.
How long does a chrome delete vinyl wrap last?
When installed using high-quality cast vinyl (such as 3M 2080 or Avery Dennison SW900) and maintained properly, a chrome delete typically lasts between 5 and 7 years before showing signs of UV degradation or wear.
Can you spray paint or plastic-dip car chrome instead of wrapping it?
While liquid rubber coatings (like Plastidip) or spray paints offer low initial cost, they lack long-term durability on smooth chrome. Spray-on coatings tend to chip easily from road debris, fade under solar heat, and look uneven around rubber trim seals compared to the smooth, OEM-like finish of cast vinyl wrapping.