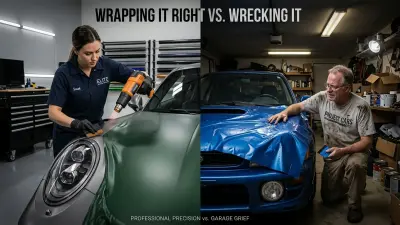
As a seasoned car wrap expert with over 15 years of experience, I've seen my fair share of installations gone wrong. And more often than not, the culprit is not the installer's skill or the quality of the film, but the workspace itself. Think of it like a surgeon's operating room – precision demands a pristine, controlled environment. Whether you're a DIY enthusiast tackling your first project or a small fleet operator looking to optimize your in-house installs, creating the perfect workspace is non-negotiable for achieving pro-level results that last for years.
I still remember my first car wrap installation like it was yesterday. I was working out of a small garage, and I thought I had everything under control. But as I started applying the film, I realized that the temperature was all wrong, the humidity was through the roof, and the dust was everywhere. It was a disaster waiting to happen. And happen it did – the film started to bubble, the edges began to lift, and I was left with a mess on my hands. It was a costly mistake, but it taught me a valuable lesson: a flawless car wrap installation starts with a well-optimized workspace.
Understanding the Importance of Temperature Control
Temperature control is perhaps the most critical factor in car wrap installation. Vinyl film is incredibly sensitive to temperature, and even the slightest deviation from the ideal range can cause problems. The sweet spot, also known as the "Goldilocks zone," is typically between 68-75°F (20-24°C). This range allows the adhesive to activate properly and for the film to conform smoothly without excessive tension. Premium films like 3M 2080/1080 series or Avery Supreme Wrapping Film are engineered to perform best within these parameters.
So, what happens when the temperature is not within the ideal range? Cold film leads to poor adhesion, lifting edges, and potential cracking. Hot film, on the other hand, can overstretch, leading to premature failure, especially on complex curves, and can trap air easily. The consequences can be costly, with repairs and reinstallation adding up quickly. To avoid these problems, it's essential to invest in a reliable shop heater or air conditioning unit, depending on your climate. And don't forget to ensure consistent temperature throughout the space, avoiding drafts from open doors that can create cold spots.
Real-World Examples of Temperature Control
Let's take a look at a real-world example. A friend of mine, who owns a car wrap shop, was working on a full wrap for a 2024 Tesla Model Y. The temperature in the shop was around 80°F (27°C), which is slightly above the ideal range. As a result, the film started to overstretch, and the installer had to apply more heat to get it to conform to the complex curves. However, this led to a premature failure of the film, and the entire wrap had to be redone. The cost of the mistake was around $2,000, which could have been avoided with proper temperature control.
Managing Humidity for a Dust-Free Environment
Humidity might seem like a minor factor, but it plays a critical role in wrap quality. The ideal relative humidity for wrapping is between 40-60%. Why is this range so important? Low humidity (below 40%) can lead to static electricity buildup, which is a dust magnet. High humidity (above 60%) can affect adhesive drying times and even contribute to tiny air pockets if moisture gets trapped. To manage humidity, you can use a humidifier in dry environments or a dehumidifier in humid climates. Monitor the humidity levels with a simple hygrometer to ensure you're within the ideal range.
Dust and contamination prevention is arguably the most crucial aspect of car wrap installation. A single speck of dust under a wrap can ruin an entire panel, creating a visible bump or "nipple" that screams amateur. Preventing dust is a multi-step process that involves pre-cleaning the workspace, using air filtration systems, and ensuring the vehicle is surgically clean. You can also use a leaf blower to clear dust from overhead rafters, and consider using a portable air purifier or a DIY box fan with a furnace filter to reduce airborne particles.
Practical Tips for Dust Prevention
So, how can you prevent dust and contamination in your workspace? Here are some practical tips: wear clean, lint-free clothing, avoid wool sweaters or anything that sheds fibers, and seal the space by keeping garage doors and windows closed during installation. You can also use a wet floor technique, lightly misting the floor with water before you start, to keep dust from becoming airborne. And don't forget to use a dedicated workbench for cutting film, organizing tools, and keeping cleaning supplies handy.
Lighting: The Key to Spotting Imperfections
Good lighting is essential for spotting imperfections, ensuring even squeegee pressure, and identifying trapped air bubbles or wrinkles. Bright, even, shadow-free lighting is key, and overhead LED strip lighting (e.g., 500-1000 LUX) is excellent. You can also consider using vertical or adjustable work lights positioned around the vehicle to highlight contours and potential issues from different angles. Proper lighting allows you to see the film's exact placement, detect subtle tension points, and ensure thorough post-heating.
Let's take a look at a real-world example. A car wrap shop I worked with was having issues with uneven lighting, which was causing imperfections in the wrap. They invested in a new LED lighting system, which provided even, shadow-free lighting. The result was a significant reduction in imperfections and a much higher quality wrap. The cost of the new lighting system was around $1,000, but it paid for itself in the long run by reducing the number of re-dos and improving customer satisfaction.
Choosing the Right Lighting for Your Workspace
So, how can you choose the right lighting for your workspace? Here are some factors to consider: the size of your workspace, the type of film you're using, and the level of detail you need to achieve. You can also consider using natural light, if possible, to provide a more even and shadow-free lighting. And don't forget to position your lights at an angle to minimize reflections and glare.
Space and Layout: Room to Breathe and Work
Cramped spaces lead to frustration, damage to the film, and potential injury. You need ample room around the vehicle to work comfortably and safely. Ensure you can walk comfortably around the entire vehicle, open all doors fully, and access the roof without bumping into walls or obstacles. For a full wrap on a vehicle like a Ford F-150 crew cab, you'll want at least 3-4 feet of clear space on all sides.
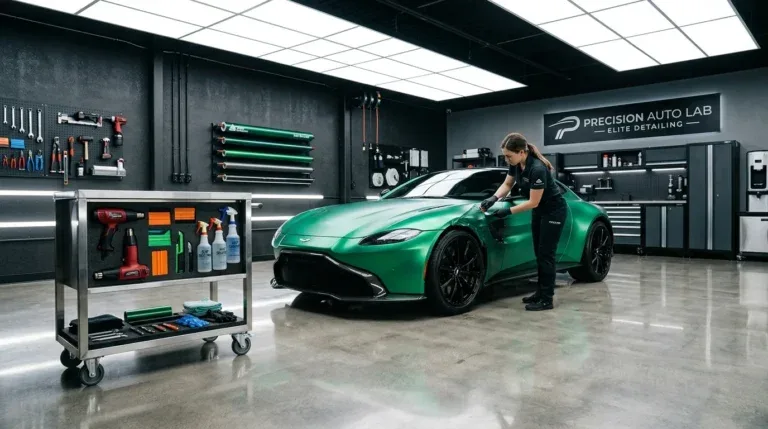
A dedicated workbench for cutting film, organizing tools, and keeping cleaning supplies handy is invaluable. You can also consider using a tool cart or a storage bin to keep your workspace organized and clutter-free. And don't forget to ensure you have access to power and air, essential utilities for car wrap installation. A reliable air compressor, a heat gun, and a vacuum are just a few of the tools you'll need to get the job done.
Designing Your Workspace for Efficiency
So, how can you design your workspace for efficiency? Here are some tips: consider the flow of your workspace, from the entrance to the exit. Ensure that your tools and supplies are within easy reach, and that you have a clear path to the vehicle. You can also consider using a workflow diagram to plan out your installation process and identify potential bottlenecks. And don't forget to leave some extra space for unexpected tasks or emergencies.