There’s nothing quite like seeing a truly exceptional vehicle wrap roll out of the shop. It’s more than just a vinyl application; it’s a transformation, a statement, and for many, a powerful tool. Whether you're looking to express your unique style, protect your investment, or turn your daily driver into a mobile billboard, the design phase is where the magic truly begins. A stunning wrap doesn't happen by accident; it's the result of thoughtful planning, understanding materials, and a keen eye for how design interacts with the curves and lines of a vehicle. As someone who’s been knee-deep in vinyl for over fifteen years, I’ve seen my share of wraps – the good, the bad, and the truly breathtaking. Let's dig into what makes a design really pop.
The Foundation: Defining Your Wrap's Purpose and Canvas
Before you even think about colors or graphics, you need to understand *why* you're wrapping your vehicle and *what* vehicle you're working with. Is this a personal passion project, a branding effort for your business, or a blend of both? The purpose dictates everything from material choice to the complexity of your design, and understanding your vehicle's inherent characteristics is key to making that design shine.
Beyond Just Aesthetics: What Do You Want Your Wrap to *Do*?
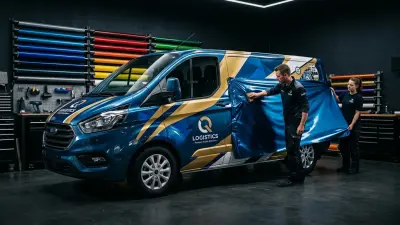
Let's be honest: a vehicle wrap can be a significant investment, ranging from a few hundred dollars for a simple chrome delete to several thousands for a full custom job on a large truck. So, what's your return on that investment? For individual car owners, it might be about personalizing a vehicle, changing its color without a costly paint job, or even preserving the original factory paint underneath with a protective layer. For businesses, a wrap transforms a vehicle into a constant advertisement, potentially generating thousands of impressions daily. I once had a client, a local bakery, whose delivery van wrap – a bright, whimsical design featuring their logo and pastries – led to a noticeable spike in catering inquiries within weeks. That’s the power of intentional design.
Knowing your primary goal helps you prioritize. If it's pure self-expression, you have more creative freedom. If it's brand advertising, legibility, brand consistency, and immediate impact become paramount. Even if you're installing Paint Protection Film (PPF), which is typically clear, you still have design choices—like opting for a matte PPF to change a gloss car's finish, or using pre-cut kits that ensure every edge is perfectly covered, creating an invisible shield. This initial clarity of purpose is your North Star throughout the design journey.
Choosing the Right Film: Your Design's Best Friend or Worst Enemy
The type of vinyl film you choose isn't just a technical detail; it's a fundamental design decision that impacts how your graphics will look, conform, and last. You wouldn't try to sculpt a masterpiece with cheap clay, right? The same goes for wraps. The two main categories you'll hear about are cast and calendered vinyl, each with distinct properties that affect design translation.
Cast vinyl is the premium, heat-activated film that truly conforms to complex curves without shrinking back excessively over time. Think of it like a liquid vinyl poured onto a casting sheet, which then solidifies. This process results in a very thin (typically 2.5–3.5 mil), stable, and durable film with excellent conformability, perfect for full color changes, intricate graphics, and deep recesses on vehicles like a Tesla Model Y or a Porsche 911. Popular brands like 3M's 2080 and 1080 series, Avery Dennison Supreme Wrapping Film, Oracal 970RA, Hexis Skintac, and Arlon Ultimate PremiumPlus are all cast films, known for their vibrant colors, diverse finishes (gloss, matte, satin, metallic, textured), and longevity, often rated for 5-7 years or more.
On the other hand, calendered vinyl is a more affordable, stiffer film that's better suited for flat or gently curved surfaces. This film is made by forcing a vinyl compound through rollers, stretching it into a sheet. While great for flat-panel fleet graphics or temporary signage, its "memory" means it has a higher tendency to shrink back, especially when stretched into curves. This can lead to lifting edges or exposed paint over time, making it generally unsuitable for a high-quality, long-term full vehicle wrap. You'll typically find calendered films in the 3.0-4.0 mil range, and while they can be a cost-effective solution for short-term projects or flat applications, they aren't what we usually recommend for a full, stunning, and durable vehicle transformation.
Then there's PPF, which is much thicker (4–10 mil, with 8 mil being common) and primarily designed for impact resistance. While clear, its thickness means it doesn't conform as easily as cast vinyl, so designs need to account for its stiffness. Some PPFs offer unique finishes like matte or stealth, which can drastically alter the appearance of a gloss factory paint job, acting as a subtle "design" choice in itself. Selecting the correct film is the first critical step in ensuring your design not only looks fantastic but also endures the rigors of the road.
Core Design Principles for Maximum Impact
Just like any great work of art, a stunning vehicle wrap adheres to fundamental design principles. The key is to remember that your canvas isn't flat; it's a three-dimensional, moving object with complex curves, gaps, and features. What looks good on a computer screen might not translate well to a vehicle if these principles are ignored.
Harmony with Vehicle Lines & Flow
Your vehicle has inherent lines, curves, and angles – use them! A truly stunning wrap design doesn't fight the car's body; it embraces and enhances it. Think about the natural flow of the vehicle: the swoop of a fender, the sharp crease along the doors, the angles of the bumpers. Designers who understand this will often use these lines as guides for graphic placement, color breaks, or even to create optical illusions that make the car look faster or more aggressive.
Imagine trying to place a perfectly rectangular logo across a car door that curves inward at the bottom and has a prominent body line running through it. Without careful planning, that logo will appear distorted, saggy, or cut off. A good designer will either adjust the perspective of the logo, choose a different placement, or integrate the body line into the logo's design, making it look intentional. When we do full wraps on something like a Ford F-150 crew cab, which requires about 18–22 linear meters of 60-inch film, we pay close attention to how graphics span multiple panels and door seams. Maintaining visual continuity and integrity across these breaks is a hallmark of professional design and installation.
Color Theory and Contrast that Pops
Color choice is probably the most immediate impact a wrap makes. Beyond simply picking your favorite shade, consider how colors interact, what message they convey, and how they’ll look in different lighting conditions. Bright, high-contrast colors will grab attention, essential for business advertising, while subtle matte or satin finishes can exude sophistication and luxury.
Think about the existing vehicle color, especially if you're doing a partial wrap. You want the chosen wrap colors to either complement or offer a striking contrast to the factory paint, not clash. A deep metallic blue on a white car for racing stripes looks sharp; a dull grey on a vibrant yellow might just look dirty. Different finishes also affect color perception: a glossy metallic film like Avery Supreme's Gloss Dark Blue Metallic will shimmer and change hue with light, whereas a matte black film like 3M 2080 Matte Black will absorb light, creating a stealthy, understated look. The goal is to create visual interest and clear communication, whether you’re aiming for understated elegance or bold, attention-grabbing flair.
Here’s a quick overview of how different finishes impact a design:
- Gloss: Reflective, vibrant colors, mimics factory paint. Great for showcasing intricate details and adding depth.
- Matte: Non-reflective, sophisticated, mutes colors slightly, hides minor surface imperfections well. Creates a sleek, modern look.
- Satin: A hybrid, offering a subtle sheen without full reflectivity. Often described as a "factory custom" look, very popular.
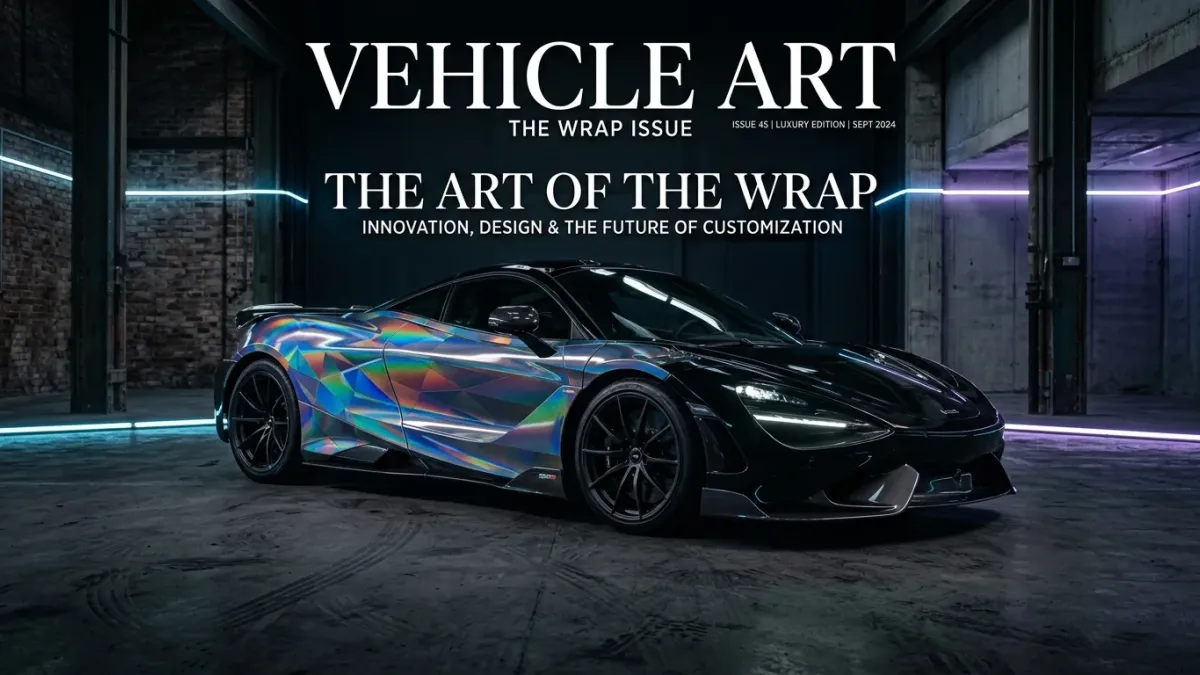
- Metallic/Sparkle: Incorporates metallic flakes for a dynamic, shimmering effect under light. Adds luxury and dynamism.
- Chrome: High-impact, mirror-like finish. Extremely difficult to install and maintain, very expensive, and usually reserved for show cars due to its delicate nature.
- Textured (Carbon Fiber, Brushed Metal): Adds tactile and visual interest, mimics real materials. Best used as accents rather than a full wrap to avoid overwhelming the design.
Typography and Messaging: Clarity is King
For business wraps, your message is paramount. What good is a beautiful wrap if people can’t read your phone number or company name as you drive by? Legibility means choosing appropriate fonts, sizes, and placements. Avoid overly intricate or thin fonts that become a blur at 30 mph. Strong, clear fonts with good contrast against the background are always the best choice for advertising.
Placement is equally crucial. Consider where logos and text will fall in relation to door handles, panel gaps, window frames, or even fuel caps. You don't want your phone number disappearing into a door seam. I always advise clients to keep primary contact information and logos in clear, unobstructed zones, typically centered on doors, hoods, or the rear of the vehicle. For a full wrap on a 2024 Tesla Model Y, which has very clean lines, we have ample space for large, impactful graphics. On a more intricate car, you might need to scale down or adjust the design elements to fit the available "canvas" without distortion.
A good rule of thumb: If someone can’t quickly grasp your message from 50 feet away while both vehicles are moving, the text isn't effective. Keep it concise, clear, and strategically placed.
From Concept to Reality: Practical Design & Implementation Tips
Once you have your purpose and core principles in mind, it’s time to bring that vision to life. This is where the rubber meets the road, quite literally, and where practical considerations prevent stunning concepts from becoming installation nightmares.
The Design Process: DIY vs. Professional
For DIY enthusiasts, there are plenty of resources out there. Online wrap templates for specific vehicles can provide a good starting point, allowing you to mock up designs in software like Adobe Illustrator or even free alternatives. Solid color changes are the most forgiving for DIYers, as they don't involve complex graphic alignment. If you're tackling something like a full color change on a sedan using 3M 2080, starting with simple panels like the hood or trunk will build your confidence.
However, for intricate graphics, complex textures, or business branding, investing in a professional designer who specializes in vehicle wraps is almost always worth it. These designers understand the nuances of vehicle dimensions, panel breaks, and how vinyl stretches and distorts. They can create accurate mock-ups, often overlaid on photos of your actual vehicle, allowing you to visualize the final product before any film is cut. They'll also account for bleed areas and panel overlaps, which are critical for a seamless installation. A professional design not only looks better but often simplifies the installation for the installer, whether that's you or a pro.
My shop often works closely with clients through several rounds of proofs. For instance, when designing a custom graphic for a motorcycle tank, which has incredibly tight curves, we'll often print a small test piece to see how the graphic distorts and then adjust the digital file accordingly. This meticulous approach ensures that the final product meets or exceeds expectations.
Avoiding Common Design Pitfalls
I’ve seen it all: logos stretching into unrecognizability across a curved bumper, text sliced right through the middle by a door handle, or busy patterns that induce headaches rather than turning heads. These are easily avoidable with careful design planning.
- Distorted Graphics: Vehicle surfaces are rarely flat. What looks perfect on a flat computer screen will distort when applied to a curved fender or a deep recess. Professional designers use templates that account for this distortion or manually adjust graphics to compensate.
- Misaligned Text/Logos: Panel gaps, door lines, and body kits can sever text or crucial parts of a logo. Always place critical information away from these "danger zones."
- Overly Busy Designs: While creativity is great, too many elements, colors, or patterns can make a wrap look cluttered and unprofessional. Often, simplicity and bold statements are far more effective. Think about negative space; sometimes what you leave *out* is just as important as what you put *in*.
- Ignoring Lighting and Reflections: Glossy films can create glare, especially with certain colors, making details hard to see in direct sunlight. Matte or satin finishes can mitigate this. Also, consider how your design might look at night under streetlights.
- Poor Resolution: Using low-resolution images for printed wraps will result in pixelated, blurry graphics once stretched across a large vehicle surface. Always ensure your source files are high-resolution (at least 150-300 DPI at print size for critical elements).
Special Effects and Details that Elevate a Wrap
Beyond basic color changes and graphics, there's a whole world of details that can elevate a wrap from good to truly stunning. These are the touches that show attention to detail and a commitment to a premium finish.
- Chrome Deletes: Blacking out chrome trim (window surrounds, grilles, badges) is a hugely popular trend. It cleans up the look of a car and often gives it a more aggressive or modern aesthetic. This can be done with a simple gloss black, matte black, or even a colored vinyl to match or contrast the main wrap.
- Custom Stripes & Accents: Racing stripes, hood vents, mirror caps, or roof wraps in a contrasting color or texture (e.g., carbon fiber) add dynamic flair without committing to a full wrap.
- Printed Textures: Modern printing allows for incredibly realistic textures like brushed metal, wood grain, or even custom patterns to be printed onto vinyl, offering unique visual depth.
- Window Perforated Vinyl (Window Perf): This specialty vinyl allows you to print graphics on the outside of rear windows while still allowing visibility from the inside. It's fantastic for business wraps, extending your design across the entire vehicle without blocking the driver's view.
- Edge Sealing: While not a "design" element in the traditional sense, proper edge sealing (post-heating the film to specific temperatures, often 200-220°F / 93-104°C) is critical for preventing lifting. A well-designed wrap will avoid excessive stretching near edges, making the installer's job easier and ensuring longevity.
Real-World Examples, Costs & Longevity
Let's talk brass tacks. What does a truly stunning wrap cost, and how long can you expect it to last? These are crucial questions for anyone considering a vehicle transformation.
What Does a Stunning Wrap Cost? (2025-2026 Estimates)
The cost of a vehicle wrap varies widely based on several factors, including the size of the vehicle, the type of film chosen, the complexity of the design, and whether you're going DIY or professional. Here’s a breakdown of what you might expect:
| Service Type | Vehicle Example | Film Type | Approximate Cost Range (Professional Install) | DIY Material Cost (Estimate) |
|---|---|---|---|---|
| Full color change wrap | 2024 Tesla Model Y (Mid-size SUV) | 3M 2080 / Avery SWF (Gloss/Matte/Satin) | $4,200 – $5,800 | $700 – $1,200 (film only, 18-20 yards of 60-inch) |
| Full color change wrap | Ford F-150 Crew Cab (Large Truck) | Oracal 970RA / Hexis Skintac (Gloss/Matte) | $5,500 – $7,500 | $900 – $1,500 (film only, 22-25 yards of 60-inch) |
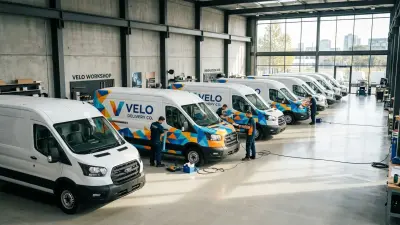
| Printed custom graphics (Full) | Mercedes-Benz Sprinter Van (Fleet) | 3M IJ180mC / Avery MPI 1105 (Printed & Laminated) | $6,000 – $9,000+ (design included) | N/A (Professional design/print recommended) |
| Full paint protection film (PPF) | Porsche 911 (Sports Car) | Xpel Ultimate Plus / SunTek Reaction (8-10 mil clear) | $5,000 – $8,000+ | $1,500 – $3,000 (pre-cut kit + bulk, DIY is challenging) |
| Partial Wrap (Hood, Roof, Trunk) | Honda Civic Si (Compact Car) | 3M 2080 / Avery SWF (Gloss Black) | $800 – $1,500 | $150 – $300 (film only) |
| Chrome Delete Package | BMW 3 Series (Sedan) | Avery SWF Gloss Black / Matte Black | $300 – $800 | $50 – $150 (small roll of film) |
These are general estimates. Geographic location, installer experience, and specific film choices (e.g., chrome films are much more expensive and difficult to work with) can push these numbers higher. While DIY can save on labor costs, the risk of wasted material, poor finish, and premature failure is significant. For a truly stunning and lasting wrap, professional installation is almost always the smarter choice.
Maintaining Your Masterpiece for Years
A beautiful design is only half the battle; proper maintenance ensures it stays stunning for its intended lifespan. High-quality cast vinyl wraps are typically rated for 5-7 years, and premium PPF can last 7-10 years or even longer, but that's with proper care. I always tell my clients, "Treat it like a high-end paint job, but easier!"
Regular washing with pH-neutral car soap is essential – typically every 1-2 weeks, depending on use. Avoid abrasive brushes, high-pressure washers too close to edges, and harsh chemicals. Many wrap manufacturers, like 3M and Avery, offer their own lines of wrap-safe cleaners and sealants. You can even apply ceramic coatings specifically designed for vinyl wraps, which adds an extra layer of protection, makes cleaning easier, and can extend the life and vibrancy of your design. The better you care for your wrap, the longer that stunning design will continue to turn heads.
The "Happy Mistake" That Became a Signature Look
I remember a client, a young entrepreneur with a new startup, came to us wanting a full wrap for his delivery van. He had a very abstract logo – a series of interlocking geometric shapes in vibrant blues and greens. His initial design concept involved repeating this logo everywhere, making the van look incredibly busy, almost dizzying. He was dead set on it. I explained how it would distort on the curves and overwhelm the eye, but he was hesitant to change it.
Instead of arguing, I proposed a compromise: we'd do a large, single, perfectly placed version of his logo on the side of the van, using its curves to our advantage. Then, for the rest of the van, we'd use a gradient blend of the blues and greens from his logo, fading from dark to light, and subtly incorporate *one* of his abstract shapes as a ghosted background pattern on the roof. When he saw the mock-up, his eyes lit up. "That's it!" he exclaimed. The simpler, elegant design made his logo pop, gave the van a sleek, modern look, and truly captured his brand's innovative spirit without being overwhelming. It became his signature, and years later, his fleet still uses that refined design. It taught me that sometimes, guiding a client to "less is more" can result in a design that's not just stunning, but truly timeless.
Creating a stunning vehicle wrap is an exciting journey, one that blends artistic vision with technical precision. It’s about more than just picking a pretty picture; it’s about understanding your canvas, choosing the right materials, and applying sound design principles to create a cohesive, impactful, and lasting statement. Whether you're aiming for personal flair or powerful branding, remember that the most breathtaking wraps are always born from thoughtful planning and a clear purpose. So, go ahead, envision that perfect wrap – and then plan it out to make it a reality!