The allure of a DIY vehicle wrap is powerful, isn't it? You’ve scrolled through countless social media feeds, watched mesmerizing time-lapses of cars transforming, and thought, "I could absolutely do that and save a fortune." The idea of giving your ride a fresh new look – a sleek matte black, a vibrant satin red, or even a custom graphic – all with your own hands, from the comfort of your garage, is incredibly tempting. As someone who’s spent over 15 years knee-deep in vinyl, wrapping everything from everyday commuters to high-end exotics, I've seen the full spectrum: the rare, truly impressive DIY triumphs, and, far more often, the frustrating, costly, and sometimes downright disastrous attempts. My goal here isn't to discourage your passion; it's to equip you with the honest truth and the knowledge you need to make a genuinely informed decision about whether a DIY wrap is truly worth the risk for you.
The Allure of DIY: Why We're Tempted (The "Pros")
Let's be upfront: there are some compelling reasons why people consider DIY wrapping. The potential for significant savings and the deep satisfaction of creating something with your own hands are huge draws. For many, it's not just about the finished product, but the journey of learning and personal accomplishment.
Unmatched Cost Savings on Labor
When it comes to a full vehicle wrap, the largest portion of the expense – often 60-70% – goes towards professional labor. This is where a DIY project promises the most significant financial relief. For example, a full color change wrap on a mid-size sedan like a 2024 Tesla Model Y typically runs anywhere from $4,200 to $5,800 at a reputable shop, depending on the vinyl finish (matte, gloss, satin, textured, or specialty films like chrome). If you undertake the project yourself, your primary expense is the material. For that same Model Y, a premium cast vinyl from brands like 3M 2080, Avery Supreme Wrapping Film, or Oracal 970RA would cost roughly $1,500 to $2,500, translating into a potential savings of over $2,000.
The cost difference becomes even more pronounced with larger vehicles. Wrapping a Ford F-150 crew cab, for instance, typically requires 18 to 22 linear meters of 60-inch wide film. A professional installation could set you back $5,500 to $7,500, whereas the material alone might range from $2,000 to $3,500. For smaller, less complex projects such as a roof wrap, mirror caps, a chrome delete (blacking out window trim or emblems), or interior trim pieces, the savings are even more compelling, as the material cost is lower and the margin for error feels less daunting.
The Deep Satisfaction of a Job Well Done
There's an undeniable, almost addictive, satisfaction that comes from stepping back and admiring a project you've completed with your own two hands. Successfully transforming your vehicle's appearance, even if it's just a single panel or a set of mirror caps, can be a huge confidence booster. It's a tangible manifestation of your effort, patience, and newly acquired skills. This sense of pride is a major motivator for many DIY enthusiasts, transforming a practical project into a personal triumph.
Imagine meticulously cleaning your vehicle's chrome trim, carefully applying Knifeless tape (a specialized cutting filament that allows you to trim film without using a knife on the vehicle's paint), laying down the vinyl, and flawlessly trimming it away to reveal a sleek, updated look. That moment of looking at the finished, perfect edge and knowing you did it all yourself is incredibly rewarding. It’s a creative outlet that allows you complete control over the schedule, letting you work at your own pace without the pressure of shop deadlines.

A Journey of Skill Development
For many, DIY wrapping isn't just about saving money; it's about the journey of skill development. People often start with smaller, less critical parts of the vehicle – a spoiler, the hood, or an interior panel – gradually building their expertise and confidence. This incremental approach allows you to learn the nuances of vinyl application, how different films react to heat and tension, and the precision required for a clean finish. It's a demanding craft that teaches patience, problem-solving, and meticulous attention to detail. This learning process itself becomes a significant part of the reward for many hobbyists, encouraging them to tackle increasingly complex projects over time.
The Hard Truth: Where DIY Often Falls Apart (The "Cons")
While the benefits of DIY wrapping are appealing, it’s crucial to understand the very real challenges and potential pitfalls. This isn't just a big sticker; it's a demanding craft that requires a specific skill set, specialized tools, and a dedicated environment. Over the years, I've cleaned up more failed DIY wraps than I can count, and the stories usually involve one of these common issues.
The Demanding Learning Curve and Skill Gap
Here's where reality often bites hard. Professional installers spend years, sometimes decades, perfecting their craft. They develop an intuitive understanding of how various vinyl films behave under heat and tension, how to expertly navigate complex curves, deep recesses, and compound shapes without bubbles, wrinkles, or overstretching. For a first-time DIYer attempting a full vehicle wrap, issues like air bubbles, unsightly wrinkles, lifting edges, material contamination, and even tearing the film are not just possibilities – they're almost inevitable.
The type of film makes a huge difference. For full vehicle wraps, professionals almost exclusively use cast vinyl, which is a premium, heat-activated film typically 2.5–3 mil thick. It's manufactured by pouring liquid polymer onto a casting sheet, creating a very stable, conformable film that holds its shape incredibly well after application and doesn't shrink back over time. Working with cast vinyl requires a delicate touch and a deep understanding of its "memory" and how to properly activate its adhesive. In contrast, calendered vinyl, which is more affordable and thicker (often 3-4 mil), is made by rolling polymer through heated rollers. It's stiffer, less conformable, and better suited for flat surfaces or temporary graphics, as it has a tendency to shrink and pull back over time, making it unsuitable for complex curves and long-term vehicle wraps. Using the wrong film, or mismanaging even the right film, can lead to disastrous, short-lived results.
The Hidden Costs: Tools, Workspace, and Material Waste
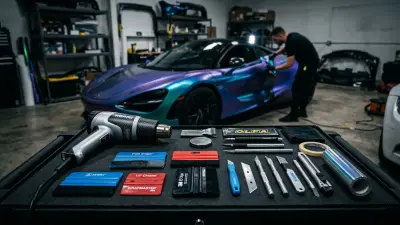
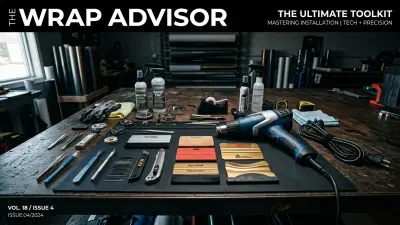
While you save significantly on labor, the financial investment in proper tools and a suitable workspace can quickly add up and often catches DIYers by surprise. This isn't just a simple squeegee and a utility knife; you'll need a quality heat gun with precise temperature control (like a Steinel HG 2120 E or a Milwaukee M18 FUEL heat gun), a variety of squeegees (hard, soft, felt-tipped, micro-squeegees for tight spaces), specialized cutting tools (a snitty for clean cuts without damaging paint, various specialized knives with break-away blades), Knifeless tape for intricate trimming, a 3M rivet brush for encapsulating rivets or textured surfaces, surface cleaners (like 70% Isopropyl Alcohol - IPA), adhesive removers, and often a professional tack reducer. These essential items alone can easily add several hundred dollars to your initial material cost.
Beyond tools, your workspace is critical. A clean, dust-free, and climate-controlled environment is paramount. Attempting to wrap outdoors or in a dusty garage is a recipe for contamination under the film, creating unsightly bumps, reducing adhesion, and significantly shortening the wrap's lifespan. You need ample space to maneuver around the vehicle, good lighting, and ideally, an air filtration system to minimize dust. Furthermore, factor in the cost of mistakes: it’s common for DIYers to buy 10-20% more material than professionals, anticipating miscuts, tears, or botched panels. This waste can significantly eat into your expected savings.
Longevity, Warranty, and Resale Value Concerns
A professionally installed wrap, using premium materials and proper techniques, is designed to last 5-7 years, sometimes even longer with excellent maintenance. It typically comes with a warranty covering both the material and the installation. A DIY wrap, due to potential installation errors, often has a significantly shorter lifespan, sometimes failing within months or a year. Bubbles, lifting edges, and premature fading are common issues that detract from the appearance and protective qualities of the wrap.
Consider also the removal process. A properly installed wrap protects your original paint, and professional removal involves specific techniques and tools to ensure the adhesive comes off cleanly without damaging the clear coat. A poorly installed DIY wrap, especially if using sub-par film or incorrect application methods, can lead to adhesive residue, paint damage during removal, or even clear coat lifting – which can be far more expensive to repair than the original cost of a professional wrap. This can negatively impact your vehicle's resale value. There’s no warranty on a DIY job, meaning any failure falls squarely on your shoulders.
Bridging the Gap: When DIY *Can* Make Sense (And How to Do It Right)
So, is DIY wrapping always a bad idea? Not necessarily. For certain projects and with the right approach, it can be a rewarding endeavor. The key is setting realistic expectations, investing in knowledge and quality, and understanding your limitations.
Starting Small: The Smart Path to DIY Success
If you're determined to try your hand at wrapping, don't jump straight into a full vehicle transformation. Start with small, manageable projects that have a lower cost of failure and provide valuable learning experiences. Excellent starter projects include:
- Chrome Deletes: Blacking out window trim or emblems. This teaches you precise cutting and working with smaller, more intricate shapes.
- Mirror Caps: These complex, curved parts are challenging but small enough to practice heating and stretching techniques without wasting too much material.
- Interior Trim Pieces: Console covers, dashboard strips, or door panel inserts are often removed from the vehicle, allowing you to work on them comfortably.
- Roof Wraps: While larger, roofs are generally flatter, making them a good stepping stone for handling larger sheets of film.
- Hood Wraps: Similar to roof wraps, hoods offer a larger, relatively flat surface to practice on before tackling more complex body panels.
For these practice pieces, consider purchasing a small roll of premium cast vinyl from reputable brands like Avery Dennison Supreme Wrapping Film (e.g., SWF 900 series) or 3M 2080. Even if it’s just for practice, using quality film will give you a more accurate feel for how professional materials behave.
Essential Tools and a Proper Workspace: No Shortcuts Here
To give yourself the best chance of success, even on small projects, you must invest in the right tools and prepare your workspace meticulously. A true professional doesn't cut corners here, and neither should you.
Here’s a basic tool list for DIYers:
- Heat Gun: A quality heat gun with adjustable temperature settings (e.g., a Steinel HG 2120 E). You'll typically work in the range of 200-250°F (90-120°C) for initial conformability, and post-heating to 180-200°F (82-93°C) is crucial for activating the adhesive's memory and ensuring longevity.
- Squeegees: A variety pack including hard plastic, felt-tipped, and soft rubber squeegees for different applications and finishes.
- Cutting Tools: A specialized wrap knife with 30-degree blades (like an Olfa SAC-1) and a Snitty cutter for safely trimming edges.
- Knifeless Tape: 3M Design Line or Finish Line tapes are indispensable for clean cuts without a blade.
- Surface Cleaner: A 70% Isopropyl Alcohol (IPA) solution for thorough cleaning after washing.
- Microfiber Towels: Plenty of clean, lint-free towels.
- Magnets: Strong vinyl wrap magnets to hold film in place during application.
- Gloves: Lint-free cotton gloves to prevent fingerprints and oils from contaminating the adhesive.
Your workspace must be as clean as possible. Sweep, vacuum, and even mist the air with water to settle dust. Work indoors, out of direct sunlight, and in a temperature-controlled environment (ideally 68-75°F or 20-24°C) to ensure optimal vinyl pliability and adhesive activation.
Material Matters: Choosing the Right Vinyl
Never skimp on material. While calendered vinyl might be cheaper, its stiffness and tendency to shrink make it unsuitable for most vehicle wraps, especially for beginners. Always opt for premium cast vinyl. Popular brands like 3M's 2080/1080 series, Avery Dennison Supreme Wrapping Film, Oracal 970RA, Hexis Skintac, and Arlon Ultimate PremiumPlus are formulated for vehicle wraps. These films are typically 2.5-3 mil thick, offering superior conformability, adhesive technology (often with air-release channels to prevent bubbles), and durability. Using quality film is half the battle; it's designed to be workable, forgiving, and long-lasting.
Here's a simplified breakdown of a basic installation step for a small, flat panel (like a practice piece):
- Preparation: Wash the panel thoroughly using a two-bucket method and a pH-neutral car wash soap. Follow with a clay bar treatment to remove embedded contaminants. Finally, wipe down the entire surface with a 70% IPA solution to remove any oils or residues. The surface must be absolutely spotless.
- Placement: Position the film over the panel, using magnets to hold it in place. Ensure you have enough overlap (2-3 inches on all sides) to wrap around edges.
- Tacking Down: Gently tack down the center of the film with light squeegee pressure.
- Application: Working from the center outwards, use your squeegee with firm, overlapping strokes, applying even pressure. Simultaneously, use your heat gun (at around 200-250°F) to gently warm the vinyl, making it pliable and conforming it to any curves. Be careful not to overheat or overstretch.
- Trimming: Once the film is fully applied, use your snitty or a sharp knife to carefully trim excess film, leaving about a 1/4 inch overhang. Wrap this overhang around the panel's edge, heating and pressing firmly to ensure a secure bond. For areas requiring precision cuts without a knife, use Knifeless tape applied before the film.
- Post-Heating: This is critical for activating the adhesive's "memory." Go over every inch of the wrapped surface with your heat gun, bringing the film's temperature to 180-200°F (82-93°C). This process causes the vinyl to "relax" into its new shape and fully bond, significantly preventing future lifting and shrinkage.
This simplified sequence only scratches the surface of the complexity involved in a full wrap, especially on complex areas like bumpers, mirrors, or door handles. But mastering these basic steps on small panels is essential.
The Pro Advantage: What a Shop Brings to the Table
After outlining the DIY path, it becomes clear why professional vehicle wrapping services exist and thrive. There’s a distinct value proposition that goes far beyond simply saving you the effort of installation. When you hire a professional, you're investing in expertise, efficiency, and peace of mind.
Expertise That Comes with Experience
A seasoned wrap installer isn't just someone who can stick vinyl to a car. They possess an intricate understanding of material science, vehicle anatomy, and advanced application techniques developed over hundreds, if not thousands, of installations. They know exactly how much tension to apply to prevent overstretching that leads to premature failure, how to manage air channels without trapping bubbles, and how to seamlessly navigate complex body lines, recesses, and component removals (like door handles, emblems, and lights) to achieve a paint-like finish. I've had countless clients come to my shop with half-wrapped cars that looked like a patchwork quilt, riddled with wrinkles and lifting edges, simply because they underestimated the sheer skill and experience required.
Professionals are also adept at diagnosing and correcting issues on the fly, a skill that only comes from extensive practice. They anticipate potential problem areas and apply specific techniques to ensure longevity, such as precise edge sealing, proper post-heating, and strategic panel layout to minimize seams. This level of expertise ensures a consistent, high-quality result that is incredibly difficult for a DIYer to replicate, regardless of how many YouTube tutorials they've watched.
Professional-Grade Results and Peace of Mind
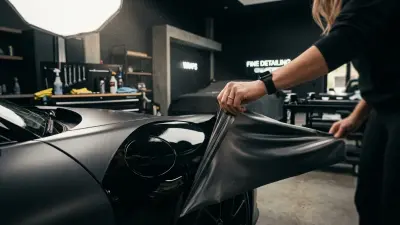
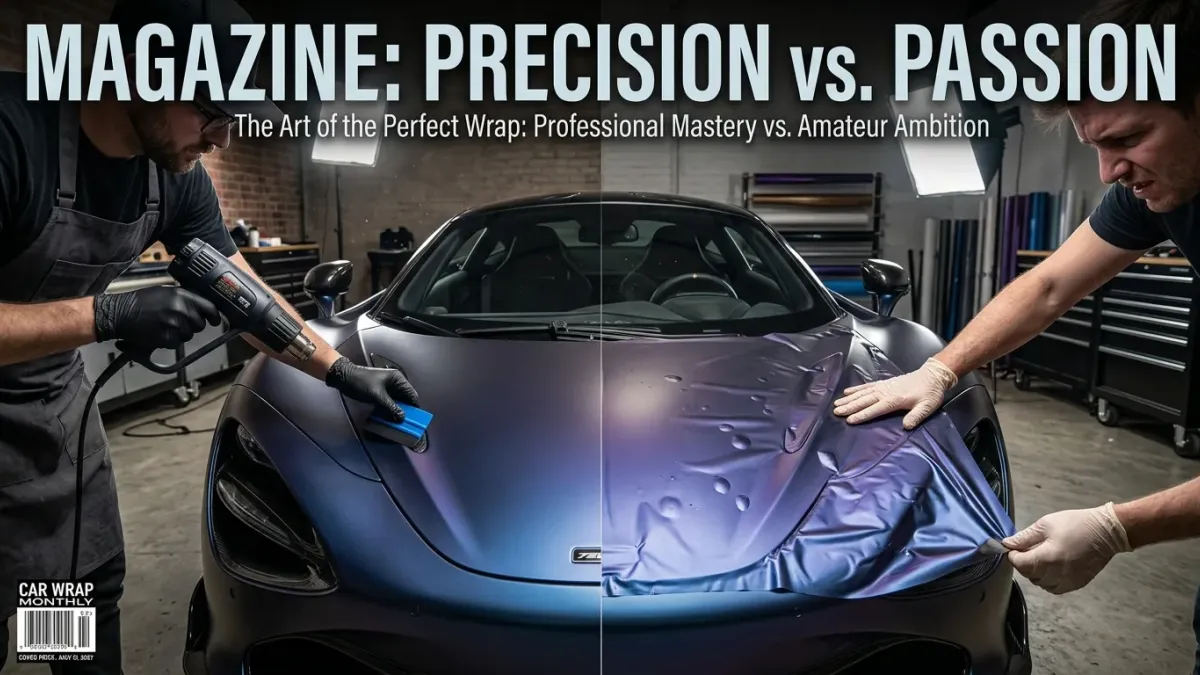
The difference between a professional wrap and a typical DIY attempt is often visible from a distance. A professional wrap will have smooth, seamless transitions, perfectly tucked edges, and a finish that looks like a high-quality paint job. There will be no visible bubbles, wrinkles, or imperfections from dust contamination. This flawless finish not only enhances your vehicle's aesthetic appeal but also provides the intended paint protection for many years.
Furthermore, when you pay for a professional installation, you're also paying for peace of mind. Reputable shops offer warranties on their labor, typically for 1-3 years, in addition to the material manufacturer's warranty. This means if an edge lifts or a panel peels prematurely due to installation error, you can bring it back for a fix at no additional cost. This safeguard is invaluable, especially considering the significant investment of a full wrap. For those who value their time, want a perfect finish, and appreciate long-term durability, the professional route is a clear winner.
Warranty, Quality, and Future Care
Beyond the initial installation, a professional shop often provides guidance on wrap maintenance and future care. They can advise on proper cleaning techniques (using pH-neutral soaps, avoiding automatic car washes), compatible waxes or sealants, and whether a ceramic coating formulated specifically for vinyl wraps is a good option (yes, it is, and can extend the life and ease of cleaning). This ongoing support helps ensure your wrap looks its best and lasts its full intended lifespan.
Here’s a comparative glance between DIY and professional wrapping:
| Feature | DIY Vehicle Wrap (Typical) | Professional Vehicle Wrap (Typical) |
|---|---|---|
| Initial Cost | Low (material only: $1,500 - $3,500) | High (material + labor: $4,200 - $7,500+) |
| Time Investment | Extremely High (40-80+ hours, often spread out) | Low (3-5 days, vehicle delivered back promptly) |
| Quality of Finish | Variable, often with visible imperfections (bubbles, lifting) | High, paint-like finish with seamless edges |
| Longevity | Shorter (1-3 years, potentially less) | Longer (5-7+ years with proper care) |
| Warranty | None (no labor warranty, material warranty can be voided) | Labor warranty (1-3 years) + Material warranty |
| Skill Required | High learning curve, precision, patience, problem-solving | Expert-level, years of specialized training and experience |
| Tools & Workspace | Significant investment in tools, dedicated clean space needed | Shop has all specialized tools and climate-controlled bays |
| Removal Risk | Higher risk of paint damage/adhesive residue | Lower risk of damage due to proper techniques |
Making Your Decision: DIY or Pro?
Ultimately, the decision of whether to DIY your vehicle wrap boils down to a realistic assessment of your goals, skills, time, budget, and appetite for risk. If your primary motivation is significant cost savings and you're willing to invest a considerable amount of time, patience, and money into specialized tools, and you're starting with small, low-stakes projects to genuinely learn the craft, then DIY wrapping might be a rewarding journey for you. It's an excellent way to gain new skills and customize smaller components.
However, if your goal is a flawless, long-lasting, paint-like finish for a full vehicle wrap, complete with a professional warranty and protection for your original paint, then entrusting your vehicle to experienced professionals is almost always the smarter, more cost-effective choice in the long run. The hidden costs, potential for frustration, and risk of damaging your vehicle’s paint or having a short-lived wrap often outweigh the initial perceived savings of a full DIY job. My advice, as someone who’s seen it all, is to start small if you’re keen on DIY, but for a full vehicle transformation, let the pros handle it. You’ll be glad you did.