Alright, let's talk about taking your vehicle wrap to the next level. You've gone through the process – whether it was a stunning full color change with a premium 3M 2080 Gloss Black Rose, a sleek Avery Supreme Wrapping Film in Satin Black, or a durable paint protection film (PPF) on your new ride. Now, you want to keep that investment looking factory fresh, protected from the daily grind, and ridiculously easy to clean. That's where ceramic coating comes in, but not just any ceramic coating, and certainly not just any application method.
As someone who's spent over 15 years knee-deep in vinyl, meticulously wrapping everything from compact hatchbacks to full-size commercial trucks, I've seen the evolution of wrap care. And I can tell you, ceramic coating for wraps isn't just a trend; it's a game-changer. But here's the kicker: it's not the same as coating factory paint. Vinyl has its own unique characteristics – its flexibility, its surface energy, and the plasticizers within the film itself. Treating it like painted metal is where most DIYers (and even some shops) go wrong.
This isn't about the "why" anymore – we know ceramic coatings boost shine, repel water, and protect. This guide is about the "how." We're going to dive deep into the specific techniques, materials, and crucial prep steps that ensure a flawless, long-lasting ceramic application on your vinyl wrap or PPF. We'll cover everything from selecting the right coating to the delicate art of application and post-care, giving you the real-world, no-fluff advice you need to succeed.
The Non-Negotiable Foundation: Pre-Coating Prep for Vinyl Wraps
Before you even think about cracking open a bottle of ceramic coating, understand this: the longevity and performance of your coating are 90% dependent on your preparation. With vinyl, this stage is even more critical than with traditional paint. Any surface contaminant, residual adhesive, or even slight oxidation will compromise the bond and lead to premature failure. Trust me, I've seen it, and it's not pretty.
Step-by-Step Vinyl Surface Preparation:
- Thorough Wash & Decontamination:
- Two-Bucket Method: Start with a meticulous hand wash using a pH-neutral car shampoo. Use the two-bucket method (one for soapy water, one for rinsing your wash mitt) to prevent transferring dirt back onto the wrap.
- Iron Remover: Even if your wrap is new, it can pick up iron particles from brake dust and industrial fallout. Use an iron remover spray (like CarPro Iron X or Gyeon Iron) specifically formulated to be safe for vinyl. Spray, let it dwell (it'll often turn purple), and rinse thoroughly.
- Tar & Adhesive Remover: For stubborn tar spots, bug guts, or any lingering adhesive residue from tape or old decals, use a dedicated tar and adhesive remover (e.g., Gyeon Tar or 3M General Purpose Adhesive Cleaner). Apply to a microfiber towel, gently dab, and wipe clean.
- Mechanical Decontamination (Clay Bar Alternative):
- Wrap-Safe Clay Mitt/Towel: Traditional aggressive clay bars can sometimes mar softer vinyl finishes, especially matte or satin. Opt for a fine-grade clay mitt or clay towel with a liberal amount of clay lube. This gently lifts embedded contaminants without being overly abrasive. Work in small sections, rinsing the mitt/towel frequently.
- Panel Wipe / IPA Prep: The Critical Final Cleanse:
- Isopropyl Alcohol (IPA) Solution: This step is non-negotiable. Mix a 15-20% IPA solution with distilled water (e.g., 1 part IPA to 4-5 parts water). For a more robust option, use a dedicated panel wipe product like Gyeon Prep or CarPro Eraser.
- Technique: Working panel by panel, spray the solution generously onto the wrap. Immediately wipe clean with a fresh, high-quality microfiber towel. Then, with a second dry microfiber towel, buff the area until it's perfectly dry and streak-free. This removes any residual oils, waxes, or polishing compounds, leaving a chemically clean surface for the coating to bond. Change your towels frequently!
- Addressing "Wrap-Specific" Contaminants:
- Plasticizer Migration: Over time, some plasticizers can migrate to the surface of certain vinyl films, creating a slight "greasy" feel. The IPA wipe helps significantly with this.
- Edge Contamination: Pay extra attention to edges and recessed areas. These are prime spots for dirt and grime to accumulate and cause coating adhesion issues later. Use detailing brushes with your IPA solution for these tricky spots.
Pro Tip: Good lighting is your best friend during prep. Use an LED inspection light to highlight any missed spots, streaks, or contaminants that are invisible in ambient light. A clean surface feels "squeaky" to the touch – that's what you're aiming for.
Selecting the Right Armor: Understanding Vinyl-Specific Ceramic Coatings
This is where many general detailers get it wrong. You cannot just slap any ceramic coating designed for clear coat paint onto a vinyl wrap. Paint coatings are formulated to bond with hard, inorganic clear coats. Vinyl, being a flexible, plasticized material, requires a different approach. Using the wrong coating can lead to cracking, hazing, poor adhesion, or even damage to the vinyl itself. The goal is a flexible, breathable, and robust bond.
Key Characteristics of Vinyl-Compatible Coatings:
- Flexibility: Vinyl expands and contracts with temperature changes. The coating must be flexible enough to move with the film without cracking or delaminating.
- Chemical Compatibility: Formulations must not react negatively with the plasticizers in the vinyl, which can cause discoloration or a sticky surface.
- Lower Solvent Content: Many paint coatings have higher solvent levels that can be aggressive on vinyl.
Recommended Brands & Types for Wraps:
- Gyeon MOHS / Syncro / Q2 Matte: Gyeon has a strong reputation for wrap-specific coatings. Q2 Matte is excellent for maintaining the original finish of matte and satin wraps, preventing oil smudges and enhancing the velvety feel without adding gloss. MOHS is a versatile option for gloss films.
- CarPro Cquartz Dlux / Skin: Dlux is often marketed for trim, wheels, and PPF, making it highly suitable for vinyl due to its flexibility. CarPro Skin is another excellent option specifically designed for flexible surfaces like PPF and vinyl.
- Ceramic Pro Vinyl: As the name suggests, this is a dedicated solution from a leading brand. It's engineered to bond directly with vinyl and PPF surfaces.
- Feynlab Plastic: Another professional-grade coating designed for plastic and flexible surfaces, which performs exceptionally well on vinyl.
- TACSYSTEM Powerbond / Quartz Max: These are more advanced options, but their formulations are often very compatible with modern vinyl and PPF.
Look for products explicitly stating "for vinyl wraps," "for PPF," or "for flexible surfaces/plastics." Avoid generic "paint coatings." A good 30ml bottle of a reputable wrap-specific coating will typically cost between $80-$150 and is enough for 1-2 layers on a standard car like a 2024 Tesla Model Y.
The Art of Application: A Step-by-Step for Vinyl
Now that your wrap is pristine and you have the right coating, it's time for application. This isn't a race; patience and precision are paramount. Work in a clean, dust-free environment, ideally indoors, with good ventilation and controlled temperature (60-75°F or 15-24°C).
Application Process:
- Read the Instructions (Seriously): Each coating has specific flash times, layering instructions, and cure times. Deviate at your own peril.
- Section by Section: Work on small areas, typically no larger than 2x2 feet (60x60 cm). This prevents the coating from curing too much before you can level it.
- Applicator & Method:
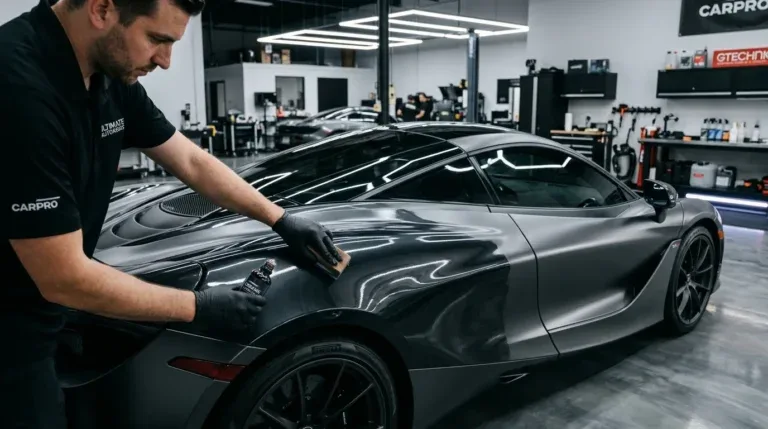
- Dispense a few drops of coating onto a dedicated suede applicator cloth wrapped around an applicator block. Ensure the applicator is sufficiently "wet" but not dripping.
- Apply the coating in an even, cross-hatch pattern (horizontal passes, then vertical passes) with light pressure. Ensure full, even coverage of your section.
- Flash Time & Leveling:
- The "Flash": After application, the coating will begin to "flash" – you'll see a rainbow-like shimmer or a slight oily residue. The time this takes varies by product and ambient conditions (humidity, temperature), usually 30 seconds to 2 minutes.
- First Wipe: Using a fresh, high-quality microfiber towel, gently wipe the excess coating away. Use very light pressure.
- Second Buff: Immediately follow with a second, completely clean and dry microfiber towel to gently buff the surface until no streaks or high spots remain. This is crucial for an even finish. Use your inspection light to check from multiple angles.
- Repeat & Overlap: Move to the next section, overlapping slightly with the previously coated area to ensure seamless coverage. Continue around the entire vehicle.
- Multiple Layers (Optional, but Recommended): For enhanced durability and performance, many coatings allow for a second layer. Wait the recommended recoat time (usually 1-4 hours) before applying the second coat, following the same process.
- Special Considerations for Matte/Satin Wraps:
- Gentle Buffing: Be extremely gentle when buffing matte/satin finishes. Excessive pressure can create shiny spots. The goal is to remove residue, not to polish.
- Dedicated Matte Coating: Always use a coating specifically designed for matte finishes to preserve the original non-reflective look.
Common Mistake Alert: Not leveling the coating properly will leave "high spots" – areas where the coating has cured too thick, creating visible streaks or dark patches. These are very difficult to remove once cured, often requiring mechanical abrasion or chemical stripping, which can damage the wrap.
Post-Application Care & Longevity: Maximizing Your Investment
You've done the hard work, now let's make sure that ceramic coating protects your wrap for its full potential lifespan of 5-7+ years (for the wrap itself, the coating typically lasts 1-3 years depending on type and care). Proper post-application care is essential.
Immediate Post-Application:
- Cure Time: Most coatings require a significant cure time before exposure to water or harsh chemicals. This can range from 12-24 hours for initial hardening, and up to 7 days for full chemical resistance. Keep the vehicle dry and away from rain, sprinklers, or heavy dew during this period.
- Avoid Washing: Do not wash the vehicle for at least 7 days after application. This allows the coating to fully bond and harden.
Long-Term Maintenance:
- Regular Washing: Wash your ceramic-coated wrap every 2-4 weeks, depending on use and environment. Use a pH-neutral car shampoo (again, the two-bucket method is your friend). Avoid harsh detergents, automatic car washes with brushes, or industrial cleaners that can strip the coating.
- Drying: Use a dedicated drying towel (e.g., a twisted loop or waffle weave microfiber) or a leaf blower/car dryer to minimize contact and prevent water spots, especially if you have hard water.
- Toppers/Boosters: Many ceramic coating brands offer "topper" or "booster" sprays. These are typically SiO2-infused quick detailers that can be applied after washing every few months. They replenish the hydrophobic properties, add a bit more protection, and enhance the look. This is a great way to maintain that fresh-coated feel.
- Avoid Abrasives: Absolutely no abrasive polishes, waxes with fillers, or harsh compounds on your ceramic-coated wrap. These will damage or remove the coating.
- Spot Cleaning: For bird droppings or bug splatters, gently remove them as soon as possible with a quick detailer spray and a soft microfiber towel. The coating makes this much easier, as contaminants won't etch as quickly.
Expected Lifespan & Costs:
- A quality, professionally applied ceramic coating can add anywhere from $500-$1000+ to the cost of a full wrap installation. For a DIYer, a good coating kit for a full vehicle (like a Ford F-150 crew cab, which typically takes 18-22 linear meters of 60-inch film) might cost $100-$200.
- The coating itself can last 1-3 years depending on the specific product, environmental exposure, and your maintenance routine. Proper care can significantly extend this.
- The underlying vinyl wrap, protected by the ceramic coating, can easily exceed its typical 5-7 year lifespan, looking fresher for longer and resisting fading and environmental damage more effectively.
By following these detailed, installer-approved steps, you're not just applying a product; you're investing in the long-term beauty and integrity of your vehicle wrap. A properly prepped and coated wrap isn't just protected; it's transformed, offering unparalleled ease of maintenance and a visual depth that truly stands out. Go ahead, give your wrap the protection it deserves – the right way!