You’ve invested in a stunning vehicle wrap – maybe it’s a sleek color change wrap on your 2024 Tesla Model Y, giving it that unique satin metallic finish, or perhaps a durable paint protection film (PPF) shielding your Ford F-150. Fantastic choice! But here’s the thing: a wrap isn't a "set it and forget it" modification. To truly get the most out of your investment, keeping it looking fresh for its full 5-7+ year lifespan, proper vehicle wrap maintenance is absolutely critical.
As someone who's wrapped hundreds of cars over 15 years, I can tell you that the difference between a well-maintained wrap and a neglected one is astounding. It’s the difference between a head-turning finish that looks new after five years and a faded, lifting mess after two. So, let’s talk real-world, no-fluff advice on how to keep your wrap looking like it just rolled out of the shop.
The Golden Rules of Washing Your Wrapped Vehicle
Washing your wrapped vehicle isn't just about making it look clean; it's about preserving the integrity and finish of the film. Regular washing, ideally every week or two, prevents contaminants from baking onto the surface and causing permanent damage. Think of it as preventative medicine for your wrap.
Hand Washing: The Only Way to Go
Honestly, if you take away one piece of advice from this entire guide, let it be this: hand washing is the only safe method for a wrapped vehicle. Automatic car washes, with their harsh brushes, high-pressure jets, and aggressive chemicals, are a death sentence for vinyl wraps. They can scratch the film, lift edges, and degrade the adhesive, leading to premature failure. You wouldn’t trust your bare paint to those machines for long, and your wrap deserves even more care.
Here’s my recommended process for a thorough hand wash:
- Pre-Rinse: Start with a gentle but thorough rinse using a pressure washer (keep the nozzle at least 2 feet away from the surface) or a garden hose. This removes loose dirt and grit that could scratch the film during washing.
- Two-Bucket Method: This is crucial. Fill one bucket with clean water for rinsing your wash mitt, and the other with water and a pH-neutral car wash soap. I highly recommend wrap-specific soaps like Chemical Guys Wrap Detailer or Meguiar's Gold Class Car Wash. Avoid soaps with wax or harsh detergents that can leave residue or damage matte/satin finishes.
- Wash Gently: Use a soft, microfiber wash mitt. Work from the top of the vehicle downwards, washing one section at a time. Rinse your mitt frequently in the rinse bucket to prevent transferring dirt back to the car. Apply gentle pressure; let the soap do the work.
- Final Rinse: Once the entire vehicle is washed, give it a final, thorough rinse to remove all soap residue.
Drying Techniques for a Spotless Finish
Drying is just as important as washing. Leaving water spots to dry in the sun can etch into the film, especially on darker colors or matte finishes. Here’s how to do it right:
- Air Drying or Leaf Blower: The safest method is to use a dedicated car dryer or a leaf blower (ensure it's clean and free of debris) to blow water off the surface. This minimizes physical contact with the wrap.
- Microfiber Towels: If using towels, opt for soft, high-quality microfiber drying towels. Gently pat the surface dry rather than dragging the towel across the wrap. This prevents swirling or scratching. I prefer plush towels from brands like The Rag Company or Gyeon.
- Quick Detailer (Optional): For an extra streak-free shine, especially on gloss wraps, you can use a wrap-safe quick detailer spray while drying.
Protecting Your Wrap: Beyond the Wash Bay
Cleaning is the first step, but protection takes your wrap longevity to the next level. Think of these products as an invisible shield against the elements.
Sealants and Coatings: Your Wrap's Best Friends
Just like paint, your wrap benefits from an added layer of protection. This is where wrap-specific sealants and ceramic coatings come into play. These products enhance gloss, deepen color, make cleaning easier, and provide critical UV protection against fading, especially for cast vinyl films like 3M 2080, Avery Supreme Wrapping Film, or Oracal 970RA, which are designed for complex curves and long-term durability.
- Wrap Sealants/Waxes: These are typically spray-on or wipe-on products that create a sacrificial layer. Look for products specifically labeled "wrap safe" or "matte safe" if you have a matte or satin finish. Traditional car waxes often contain petroleum distillates or abrasives that can damage matte finishes or leave a sticky residue. Good options include Chemical Guys Meticulous Matte Auto Wash & Detailer or Adam's Polishes Matte Detailer. Apply these every 2-3 months.
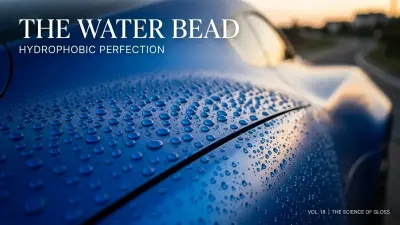
- ceramic coatings for Wraps: For the ultimate protection, consider a ceramic coating designed for vinyl. Brands like Gyeon Q2 Matte, CarPro CQuartz Lite, or Feynlab Wrap Ceramic offer incredible hydrophobicity (water beading), UV resistance, and make cleaning a breeze. These coatings bond at a molecular level, offering protection for 1-2 years. For PPF, ceramic coatings are also highly recommended, enhancing its already robust self-healing and protective properties. While a full wrap on a vehicle like a Ford F-150 crew cab takes about 18-22 linear meters of 60-inch film, a ceramic coating for that same vehicle might cost an additional $500-$1000 for professional application, but it's worth it for the added defense.
Sun & Environmental Damage Prevention
The sun is one of your wrap's biggest enemies. Prolonged exposure to harsh UV rays can cause fading, cracking, and premature aging, especially on horizontal surfaces like the hood and roof. Always try to park your wrapped vehicle in the shade or, even better, in a garage. If you don't have access to covered parking, consider a car cover for extended outdoor periods.
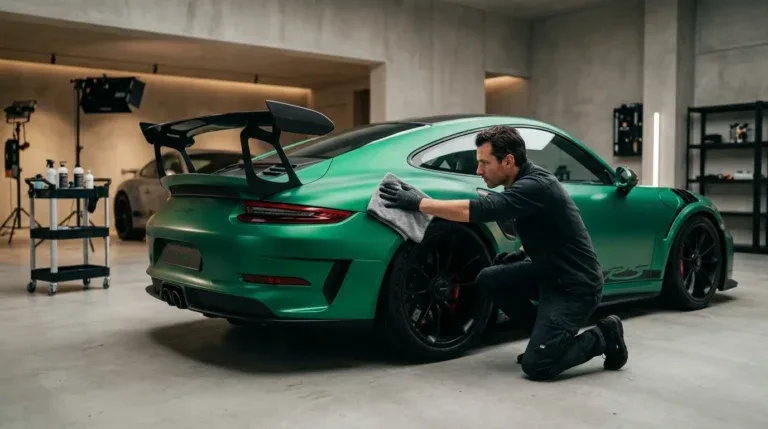
Beyond the sun, environmental contaminants pose a threat. Bird droppings, tree sap, and bug guts are highly acidic and can etch into the vinyl if left too long. For example, imagine this situation: you've just wrapped your new Mustang in a vibrant gloss blue, and after a weekend drive, you find a few bird droppings. Don't wait! Grab a quick detailer spray and a microfiber towel immediately. Gently spray the area, let it dwell for a moment, and then softly wipe it away. The longer these sit, the harder they are to remove without damage.
Tackling Stains and Tough Spots
Sometimes, despite your best efforts, you'll encounter a stubborn spot. Don't panic, but also don't reach for harsh household cleaners!
Targeted Cleaning for Specific Contaminants
- Tar and Asphalt: For tar spots, a wrap-safe tar remover is your best bet. Apply it to a microfiber towel, gently dab the area, and let it soften the tar before wiping away. Brands like Gyeon Tar or CarPro TarX are excellent.
- Stubborn Grime: For general stubborn grime or light scuffs, a 50/50 mixture of isopropyl alcohol (IPA) and water can work wonders. Always test it on an inconspicuous area first, and use it sparingly with a clean microfiber towel. Avoid excessive rubbing, especially on matte finishes.
Edge Care and Lifting Prevention
The edges of your wrap are the most vulnerable points. During installation, professional installers use techniques like proper tensioning, specific squeegee pressure, and crucial post-heating (heating the film to 200-220°F (93-104°C) to set the adhesive and relieve material tension) to ensure the film conforms and stays down. Even with perfect installation, extreme weather changes or improper washing can cause minor lifting over time.
If you notice a small edge lifting, what would you do in this situation? For tiny, early lifts, you can sometimes gently re-adhere it yourself with a heat gun set to a low temperature (around 150-180°F or 65-82°C) and a soft squeegee or even your gloved finger. Apply heat for a few seconds, press down firmly, and then allow it to cool. However, for anything more significant, I strongly recommend taking it back to your installer. Attempting to fix larger lifts yourself often leads to creases or further damage. Prevention is always better than cure here, so gentle handling during washes is key.
What NOT to Do (Common Mistakes to Avoid)
Knowing what to do is important, but knowing what *not* to do can save you hundreds, if not thousands, in potential damage and re-wrapping costs.
Automatic Car Washes: A Wrap's Worst Enemy
I can't stress this enough: stay away from automatic car washes. The stiff brushes will scratch your vinyl, especially gloss finishes. The high-pressure jets can lift edges and seams, allowing water to get underneath the film. And the harsh, often unregulated chemicals can strip away any protective layers, dull your finish, or even stain it. It’s simply not worth the risk, no matter how convenient it seems.
Harsh Chemicals and Abrasive Tools
Avoid any cleaners containing solvents, degreasers, paint thinners, or any petroleum-based products not specifically designed for vinyl wraps. These can degrade the vinyl, cause discoloration, or damage the adhesive. Similarly, never use abrasive pads, stiff brushes, or sponges with scrubbing surfaces. These will scratch the film, and once scratched, vinyl is much harder to "fix" than paint.
Over-Polishing and Buffing
While traditional paint often benefits from polishing and buffing, vinyl wraps generally do not. This is especially true for matte, satin, or textured wraps. Polishing a matte finish will make it shiny and inconsistent, ruining its unique look. Even gloss wraps can be damaged by aggressive polishing, as you're essentially removing a thin layer of vinyl. If you have a gloss wrap and notice light swirling, consult a wrap professional before attempting any polishing yourself. A wrap-safe detailer or ceramic coating is usually all you need to restore shine and clarity.
Let me add something here: PPF, being a thicker, often self-healing film (typically 4-5 mil thick compared to a 2.5-3 mil cast vinyl wrap), can sometimes tolerate very light polishing to remove minor swirls, but this should only be done by an experienced detailer with specific knowledge of PPF care. It's not a DIY job!