Alright, fellow wrap enthusiasts and DIY warriors! As someone who's spent over 15 years knee-deep in vinyl, transforming everything from daily drivers to show-stopping custom rigs, I've seen it all. And one of the most common questions I get asked after a killer wrap job is: "How do I keep this looking brand new for as long as possible?"
While a quality vinyl wrap like a 3M 2080 series or Avery Supreme Wrapping Film is incredibly durable on its own, capable of lasting 5-7 years with proper care, there's an advanced step you can take to elevate its protection, simplify maintenance, and even enhance its appearance: ceramic coating. But here's the kicker – coating a vinyl wrap isn't quite the same as coating factory paint. There are nuances, specific prep steps, and application techniques that are crucial for success.
You've invested your hard-earned money and time into a stunning color change on your 2023 Ford Mustang GT, or maybe you've painstakingly applied intricate custom graphics to your adventure-ready Toyota Tacoma. The last thing you want is for that protective ceramic layer to fail, streak, or worse, damage your wrap. This isn't just about boosting shine; it's about adding a robust, semi-permanent sacrificial layer that stands up to UV degradation, chemical etching, and makes cleaning a breeze. Forget the vague instructions – today, I'm pulling back the curtain and sharing the exact, hands-on process we use in the shop, tailored for the serious DIYer.
The Foundation: Prepping Your Wrapped Surface Like a Pro
Let's be blunt: 90% of a ceramic coating's performance hinges on the preparation. You can have the most expensive, advanced coating on the market, but if your surface isn't immaculate, you're just sealing in contaminants. For vinyl wraps, this initial cleaning and decontamination process is even more critical than for paint. Vinyl has a different surface energy and often a microscopic texture that can trap grime.
Essential Cleaning Supplies & Techniques for Vinyl
Before you even think about coating, the wrap needs to be surgically clean. This isn't just a quick car wash; it's a deep cleanse.
- pH-Neutral Car Shampoo: Always start with a high-quality, pH-neutral car shampoo. Brands like Adam's Car Shampoo, Meguiar's Gold Class, or CarPro Reset are excellent choices. Avoid harsh detergents or dish soap, as these can strip waxes, sealants, and potentially dry out the vinyl's plasticizers over time.
- Two-Bucket Wash Method: This is non-negotiable. One bucket for soapy water, one for rinsing your wash mitt. This prevents transferring grit back onto the wrap and causing micro-scratches, especially on gloss finishes.
- Soft Microfiber Wash Mitts: Use plush, high-quality microfiber mitts. Dedicate separate mitts for upper and lower sections of the vehicle.
- Gentle Pressure: When washing, use light, even pressure. Allow the soap to do the work. For textured wraps (like matte, satin, or brushed finishes), ensure you work the mitt into the texture gently to lift embedded dirt.
- Thorough Rinsing: Rinse thoroughly, ensuring no soap residue is left behind. Use deionized (DI) water if possible to prevent water spots, especially if you're working outdoors.
- Drying: Pat dry with soft, absorbent microfiber drying towels (e.g., The Rag Company Gauntlet or Griot's Garage PFM). Avoid dragging towels across the surface. For intricate areas and seams, use a leaf blower or a dedicated car dryer to force water out and prevent trapped moisture.
Decontamination: Why It's Different for Wraps
Once clean, your wrap needs to be decontaminated. On paint, this usually involves clay barring. However, traditional clay bars can be too aggressive for vinyl, potentially marring the finish or pulling up edges, especially on thinner films or delicate finishes like matte. Instead, we rely on chemical decontamination:
- Iron Remover: Products like CarPro Iron X or Gyeon Iron remove embedded ferrous particles (brake dust, rail dust) that aren't visible but can cause long-term damage and prevent proper coating adhesion. Spray evenly, let it dwell for 5-10 minutes (it will turn purple as it reacts), and rinse thoroughly.
- Tar & Adhesive Remover: For stubborn tar spots, tree sap, or old adhesive residue, a dedicated tar remover (e.g., Gyeon Tar, CarPro TarX) is essential. Apply to a microfiber towel and gently wipe affected areas. Rinse immediately after.
- Surface Prep Spray / IPA Wipe: This is the final, crucial step. A dedicated panel prep spray (like Gtechniq Panel Wipe, CarPro Eraser, or a 15-20% Isopropyl Alcohol solution diluted with distilled water) removes any remaining oils, waxes, polishing residues, or fingerprints. Spray onto a clean microfiber towel, wipe a small section (e.g., a 2x2 ft area), then immediately buff off with a second clean, dry microfiber towel. Work methodically over the entire vehicle. This step is non-negotiable for proper coating bonding.
Final Inspection & Environmental Control
Before application, do one last walk-around. Use a bright LED light to check for any missed spots, dust, or contaminants. Ensure your working environment is clean, dust-free, and ideally between 60-75°F (15-24°C) with moderate humidity. Avoid direct sunlight, which can cause coatings to flash too quickly and lead to high spots.
Decoding Your Coating: Selecting the Right Product & Understanding Its Chemistry for Vinyl
Not all ceramic coatings are created equal, and this is especially true when it comes to vinyl. The rigid, glass-like nature of many paint-specific coatings can sometimes struggle to bond or flex with vinyl, which is a thermoplastic film designed to expand and contract with temperature changes. You need a coating specifically formulated for flexible surfaces.
Cast vs. Calendered Vinyl & Coating Compatibility
Understanding your wrap film is key. Cast vinyl (like 3M 2080, Avery SWF, Oracal 970RA) is premium, thinner (2.5-3.5 mil), and highly conformable, designed for complex curves and long-term durability. It has excellent dimensional stability. Calendered vinyl is thicker (3.5-5 mil), more rigid, and better suited for flatter surfaces. Both can be coated, but cast films, with their smoother, more stable surface, often yield slightly better results and longevity from the coating.
Matte vs. Gloss Finishes: Application Nuances
- Gloss Wraps: These behave most similarly to painted surfaces. The coating will enhance gloss, depth, and clarity. Application is straightforward, similar to paint, but always with a vinyl-specific coating.
- Matte/Satin Wraps: This is where it gets tricky. The beauty of a matte wrap (e.g., 3M 2080 Matte Black, Avery Satin Grey) is its non-reflective, velvety finish. A generic ceramic coating can potentially alter this finish, making it unevenly shiny or streaky. You MUST use a ceramic coating specifically designed for matte or satin finishes. These formulations maintain the flat appearance while adding protection.
Top Pro-Grade Coatings We Trust for Vinyl
Based on hundreds of applications and years of real-world testing, these are the coatings I confidently recommend for wrapped vehicles:
- Gtechniq Halo Flexible Film Coating: This is often our go-to in the shop. Halo was engineered from the ground up specifically for PPF and vinyl wraps. It provides exceptional chemical and UV resistance, is highly hydrophobic, and importantly, remains flexible, allowing it to move with the vinyl. It's safe for all finishes, including matte, enhancing color without adding unwanted gloss. A 30ml bottle typically covers a medium-sized car like a 2024 Tesla Model Y, costing around $70-$90.
- CarPro Cquartz Lite: While not specifically for vinyl, Cquartz Lite is a user-friendly, SiO2-based coating that performs very well on gloss wraps. It offers excellent gloss, slickness, and water behavior. For matte wraps, CarPro also offers CarPro Cquartz Skin, which is specifically formulated for PPF and matte vinyl, designed to maintain the factory finish. A bottle of Cquartz Lite is usually $40-$60.
- Ethos Resist: Another solid contender, Ethos Resist is a professional-grade ceramic coating that boasts excellent durability and chemical resistance. It's versatile enough for both paint and vinyl, delivering impressive hydrophobic properties and a deep, rich look on gloss wraps.
When selecting, always read the manufacturer's instructions carefully. These specialized coatings are formulated to bond optimally with the unique composition of vinyl. Avoid any product that doesn't explicitly state compatibility with vinyl or PPF, especially if it contains heavy solvents or abrasives.
The Application Masterclass: A Step-by-Step DIY Process
You've prepped your wrap to perfection and chosen the right coating. Now for the moment of truth: application. Precision and patience are your best friends here.
Optimal Environment & Tool Checklist
Ensure you have:
- Indoor, Well-Lit Area: Essential to see your work and prevent premature flashing.
- Nitrile Gloves: Protect your skin from chemicals and prevent transferring oils to the wrap.
- Dedicated Foam Applicator Block & Suede Applicator Cloths: Most coating kits come with these. The suede cloths are crucial for even product distribution.
- High-Quality Microfiber Towels (3-5 per panel): Short-nap, edgeless towels are best for leveling and buffing. You'll need plenty, as they quickly become saturated with coating residue.
- LED Inspection Light: A handheld light (e.g., ScanGrip Matchpen) helps spot high spots or streaks.
- Panel Wipe / IPA Spray: For quick corrections if you spot a high spot too late.
Section-by-Section Application Technique
Work on one small panel or a 2x2 foot section at a time. Do NOT attempt to coat an entire door at once.
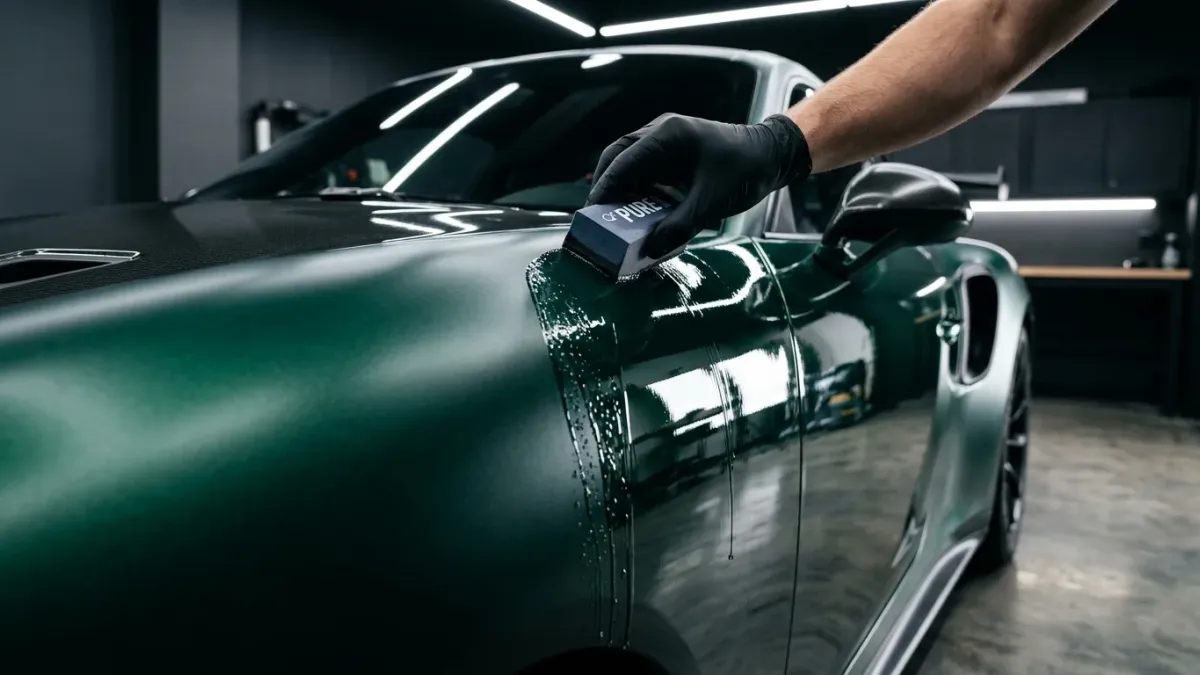
- Prime the Applicator: Apply several drops of ceramic coating onto your suede applicator cloth (wrapped around a foam block) until it's evenly saturated. For Gtechniq Halo, this usually means a line across the length of the applicator.
- Apply Evenly: Using light, even pressure, apply the coating in a cross-hatch pattern (horizontal passes, then vertical passes). Ensure full coverage of your section. You should see a thin, wet layer.
- Observe Flash Time: This is critical. The coating will begin to "flash," meaning it starts to cure and thicken slightly, often showing a rainbow or oily sheen. Flash times vary by product, temperature, and humidity, but typically range from 30 seconds to 2 minutes. For example, Gtechniq Halo might flash in 45-60 seconds in a 70°F garage.
- Level & Buff: Immediately after the coating flashes, use your first clean microfiber towel to gently level the coating, making 2-3 passes over the section. Then, with a second clean, dry microfiber towel, buff the area to a streak-free finish. This step removes any excess product and ensures even coverage. Use your inspection light to check for high spots (excess coating that cures unevenly). If you see one, immediately re-apply a small amount of coating to that spot, let it flash briefly, and then buff again.
- Repeat: Move to the next 2x2 ft section, overlapping slightly with the previously coated area. Continue this process until the entire vehicle is coated.
Special Considerations for Edges, Seams, & Complex Curves
- Edges: Be meticulous around edges and panel gaps. Apply the coating right up to the edge, but avoid getting too much product into seams, as it can be difficult to remove and potentially cause lifting if it cures as a thick blob.
- Recessed Areas: For areas like door handles, mirror bases, or deeply recessed body lines, use a smaller applicator or wrap a suede cloth around your finger to ensure full coverage without over-applying.
- Rivet Brush for Rivets: If coating a commercial truck wrap with exposed rivets (e.g., on a Ford F-150 crew cab's bed rails), apply coating around them carefully, and for optimal coverage, use a small, soft-bristled brush (like a 3M rivet brush) to work the coating into the contours around the rivet head, then buff clean.
The Critical Post-Application Inspection & Buffing
Once you've coated the entire vehicle, perform a final, thorough inspection under strong light from multiple angles. High spots are the bane of ceramic coating. If you find one that's fully cured, you might need a mild abrasive polish (specifically safe for vinyl) or even light wet-sanding (extreme caution advised!) to remove it. It's far easier to catch them during the application process.
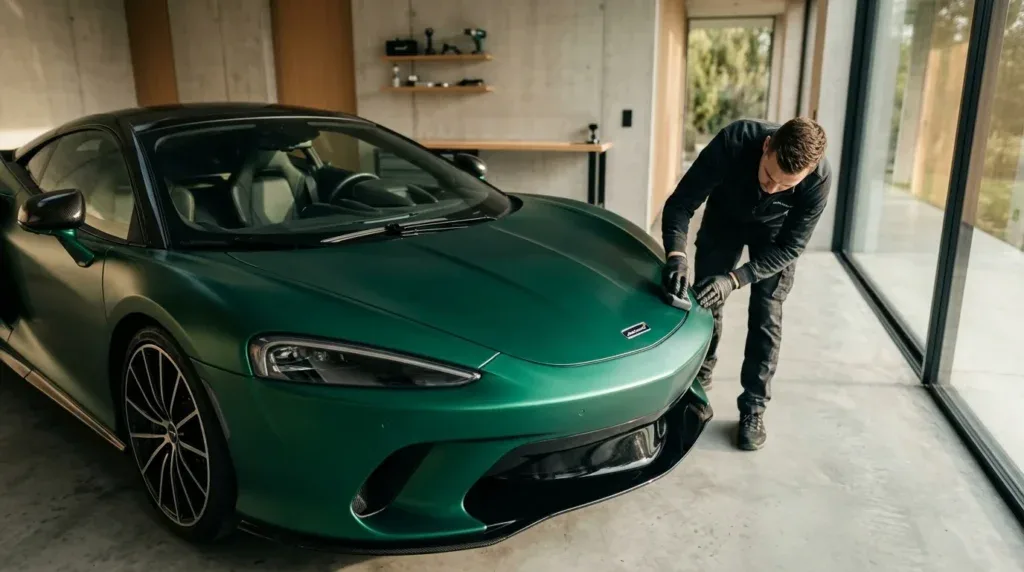
Nurturing Your Coated Wrap: Curing, Maintenance & Longevity
Your hard work isn't over once the last buffing towel is put away. The initial curing period and ongoing maintenance are just as important for maximizing the life and performance of your newly coated wrap.
The Curing Period: What to Avoid
Ceramic coatings need time to fully cure and harden. This usually takes 12-24 hours for initial hardening and up to 7 days for a full, permanent bond. During this time:
- Avoid Water: Keep the vehicle completely dry for at least 12-24 hours. Rain, sprinklers, or washing during this period can interfere with the curing process, leading to streaks or reduced durability. If it unexpectedly gets wet, gently pat dry with a clean microfiber towel.
- Avoid Harsh Chemicals: Stay away from car washes, harsh cleaners, or anything abrasive for at least 7 days.
- Optimal Environment: Keep the vehicle in a controlled environment (garage) if possible, away from heavy dust or extreme temperature fluctuations during the initial cure. Some professional installers use infrared (IR) curing lamps to accelerate the process, but this isn't practical for DIYers.
Post-Coating Maintenance Schedule & Products
The beauty of a ceramic-coated wrap is simplified maintenance, but it still requires attention.
- Washing: Wash your vehicle every 2-4 weeks using the two-bucket method and pH-neutral car shampoo. The hydrophobic properties will make dirt and grime slide off effortlessly. A full wrap on a large SUV like a Chevrolet Tahoe that used to take an hour to wash might now take 30-40 minutes.
- Drying: Always dry the vehicle immediately after washing to prevent water spots, which can still occur, especially in hard water areas.
- Toppers & Boosters: To maintain the coating's performance and slickness, consider using a ceramic-compatible quick detailer or a dedicated "sio2 topper" every few washes. Products like Gtechniq C2 Liquid Crystal or CarPro Reload enhance the hydrophobic properties and add a layer of sacrificial protection.
- Avoid Traditional Waxes: Traditional carnauba waxes or polymer sealants are generally unnecessary and can sometimes interfere with the ceramic coating's self-cleaning properties. Stick to ceramic-specific maintenance products.
Troubleshooting Common Issues (High Spots, Streaking, Premature Wear)
- High Spots/Streaking: If you notice a high spot or streak after the coating has cured (within 24 hours), you might be able to remove it with a targeted spot application of panel prep spray on a microfiber towel, gently rubbing the affected area. If it's more stubborn, a very mild polish designed for vinyl (e.g., Adam's Surface Prep Polish) might be needed, but use extreme caution, especially on matte finishes.
- Premature Wear: If your coating isn't performing as expected (loss of hydrophobicity), it could be due to improper prep, incorrect application, or using incompatible chemicals during maintenance. A deep chemical decontamination (iron remover, tar remover) might revive it, otherwise, a reapplication might be necessary.
A properly applied ceramic coating on a quality vinyl wrap can easily extend its pristine appearance and protective qualities from 5-7 years to 7-9 years or even longer, assuming good underlying wrap quality and regular maintenance. The DIY investment for a good quality kit (like Gtechniq Halo for a mid-size sedan) might be around $70-$100 for the coating itself, plus another $50-$100 for proper prep chemicals and towels. This is a fraction of the $400-$800+ a professional application might cost for a full wrap, giving you significant savings and the satisfaction of a job well done. Now go forth and protect your investment with confidence!